We prime the car before painting: tips for a car enthusiast
The primer of the car, which is produced before painting, is a necessary operation when updating the appearance of the car. This process cannot be called simple and easy, but with some effort it can be done independently.
Necessary tools
The first thing to do is get the tools. Their list includes:
- spray gun;
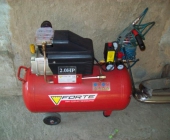
- compressor;
- hose;
- filter.

Do not buy the most expensive devices. If painting is to be done, then a high-quality and operational primer of a car will not work without a paint sprayer, but you can use a model with an upper tank location. This will allow economical use of the composition.
On the other hand, when painting on your own, it is unprofitable to buy a separate spray gun for a primer, and it is not recommended to use a primer for painting - the quality of the coating will be unimportant. Therefore, you can buy one good spray gun and prime it with it. But in this case, it is necessary to thoroughly rinse and clean the spray gun, up to its complete disassembly and assembly, since the primer is a rougher material in comparison with paint and varnish.
When choosing a compressor, you should ask how much is its performance? It should be one and a half times more than the power of the spray gun. This condition is necessary if the receiver is small. Otherwise, (if its volume is 100 liters), the performance indicator can be ignored, since this will not cause pressure fluctuations.
For priming a car, you should purchase hoses: rubber and plastic hose-spring. This will allow you to carry the spray gun on your shoulder, which will ensure convenient work. The next detail is a filter, it is permissible to use fuel from a VAZ car.
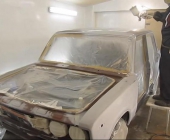
Security measures and preparatory stage
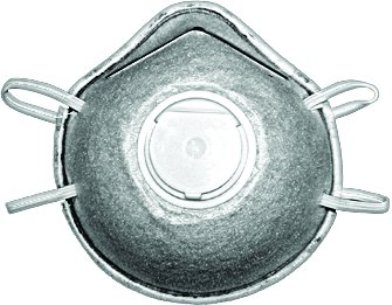
Mask with carbon filters. Click on the photo to enlarge.
After the technical component of the priming operation is ready, take care of protective equipment. Such work should be carried out in a mask with carbon filters. This will prevent inhalation of toxic primer fumes. Replacement filters are commercially available. Saving on your own safety can end badly! In addition, it is desirable to use a respirator in which carbon filters are combined with paper ones. Moreover, it is desirable to change the latter as often as possible - this will protect health and extend the life of the coal components.
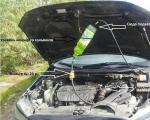
Before you start priming, be sure to take a rag, dip it in solvent (marking 650) and place it on some inconspicuous area of the car. After 20 seconds have passed, check if there are any "wrinkles" in this place. If they are not, then everything is in order. If they are found, be prepared that when the primer ends, and then the painting of the car, the same defects form on its surface.
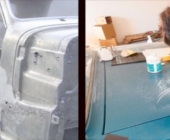
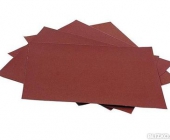
Removing the old coating
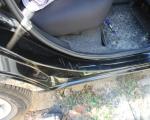
To avoid such troubles, before the priming of the cars begins before the next painting, it is necessary to remove all rust and peeling paint. To remove the paint, you can take P180 sandpaper. The metal is cleaned with an emery cloth with a grit of 240. If this operation is not performed well enough, then the new paint will simply swell after drying.
Then wipe the car and degrease its surface, and then proceed to puttying. The choice of mixture depends on the size and depth of the dents. If it reaches 1 cm, then fiberglass putty is suitable, in extreme cases - finishing. If it is not possible to buy different putty, then you can use the universal one.
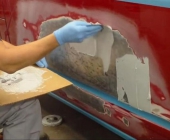
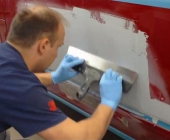
It is better to use spring spatulas. Putty is applied along the transverse lines, and leveled - along the longitudinal ones. It should dry until the surface in this area becomes hard. Then it is overwritten using P60-240 sandpaper and a special planer. In addition, after stripping, you can go through the same areas with P 400 emery (preferably with water), which levels out scratches. You also need to clean the entire surface that is supposed to be primed - you can’t do this for gloss!
Before applying the primer, the surface must be degreased, and then wiped with an antistatic cloth.
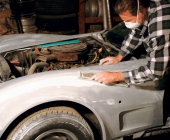
How to breed and apply soil?
The main stage, from which the primer of the car begins before body painting, consists in preparing the solution and applying it to the body. However, it does not hurt to first make sure that there are no scratches or bumps.
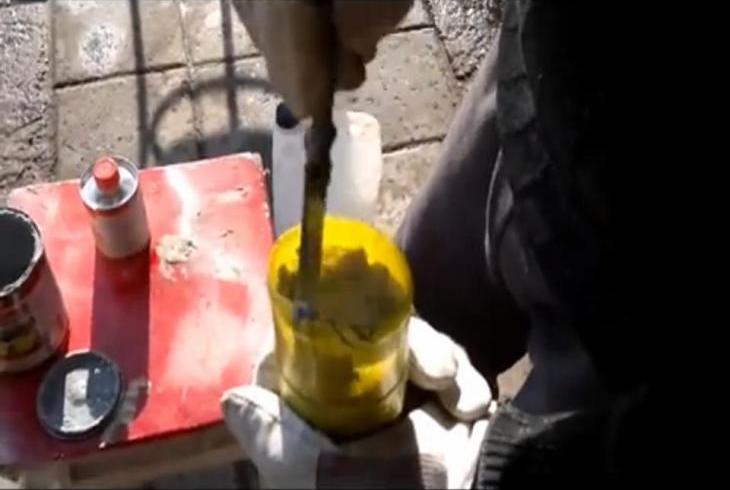
Soil cultivation. Click on the photo to enlarge.
It is forbidden to carry out a primer before painting in a room where there is a lot of dust and debris. In order for these works to be completed successfully, free access to each side of the car should be provided.
Prepare the composition in accordance with the proportions indicated on the package. The mixture includes primer, solvent and hardener. All components are thoroughly mixed. Do not prepare large portions, otherwise the solution will dry too quickly.
Sometimes the question arises: “Do I need to match the color of the mixture to the tone of the paint in order to prime before painting?”. The paint should be applied in an even layer, but if a chip forms, then a primer of a similar color will make such a defect invisible.
It will be easier to cover a primer of the same color with a layer of paint. Most often, a gray primer is used before painting. This is an excellent basis for subsequent painting activities. In certain cases, it is advisable to use white and black shades. The main condition: you need a primer of one marking.
Ground application is an operation that cannot be ignored. Why prime a part before final painting? Such preparatory operations increase the anti-corrosion resistance of the body and make it possible to obtain an ideal paintwork. The primer is a special layer on which the paint rests, for which it clings.
When the paint sprayer is filled with the composition, you should be sure of your own painting abilities. The sample needs some kind of hard surface. You can use plywood, bar. Also, do not forget to set the optimal torch power. A high-quality primer can be obtained by means of a pressure of 3-4 atmospheres.
When the "practical course" on the auxiliary planes is completed, the primer of the car begins. How long this operation takes depends on the skill of the performer and the performance of the equipment. It is imperative to start work from the edge, moving towards the raw surfaces, regardless of whether a manual or electric compressor is used to primer.
![]()

The scheme for applying a primer to a car before painting is as follows: first, the composition must be laid in parallel, one strip should be halfway on the other. After the initial treatment, a 15-minute break is taken to allow the primer to dry naturally.
Experts are unanimous in the question: "Do I need a two-layer high-quality primer before painting?". This is a guarantee of a complete pre-painting treatment. Only the second layer is applied in the perpendicular direction. If you want to get a 100% flawless painting, then the primer is applied even in three layers.
It is impossible to say exactly how long the primer, which was completed before painting, dries, since it depends on the consistency of the composition, weather, humidity, and also on the thickness of the layer.
However, the instructions usually indicate how long the primer should dry under standard conditions before painting. This takes 4 to 6 hours.
The second pre-painting operation - grinding
You need to wait as long as indicated on the package in which the primer composition was located. While the primer dries for painting, prepare for the next necessary procedure for the exterior of the car. It is grinding.
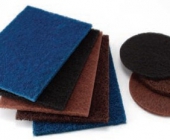
The main "tool" with which the primer is sanded before the final automotive painting is "sandpaper". If grinding will be done dry, then the P400 blade grade will do. When wet, it is better to use the P800 brand. To process places that are difficult to reach, it is rational to resort to the help of Scotch Brite.
Automotive painting after a preliminary two-layer primer will not be ideal if the sanding operation is neglected. The dry method is more appropriate, since water interacts negatively with the metal.
It is forbidden to sand certain types of primer with water. Then why use the wet method? To simplify the procedure and reduce the amount of dust. The choice of technology is at the discretion of the performer, but if a dry method is used, then a dust mask should be used.
Most craftsmen prefer wet sanding, as it saves material and eliminates the need for re-sanding, because it is impossible to cover scratches from P 400 sanding with paint. To remove possible defects and sagging (especially important for a puttied surface), it is required to clean it with a special planer.
The actual painting itself begins after the priming and sanding process is completed.