Removing chips on a car: how to remove and fix them on the hood of a car?
With the course of operation, minor defects in the form of scratches and chips appear on the car. These body damages are not only shortcomings from an aesthetic point of view, but also represent a practical danger to the car. Therefore, it is necessary to eliminate the chips that have appeared as soon as possible. This will protect the body from the harmful effects of corrosion. This article discusses the removal of chips with your own hands.
Relevance
Chips form on any machine, even under careful operating conditions. This is explained by the fact that the principle of their appearance is the impact on the paintwork of small particles like stones. It is impossible to avoid this, you can only try to protect the car. Most often, these minor defects appear on the front bumper and hood of the car.
Not only the appearance of the car suffers from the presence of chips, but also its body, since at the points of chips the metal is open to interact with the environment. So this is where corrosion comes in. In view of this, it is necessary to regularly remove chips or protect the car from their appearance.
Preparation and materials
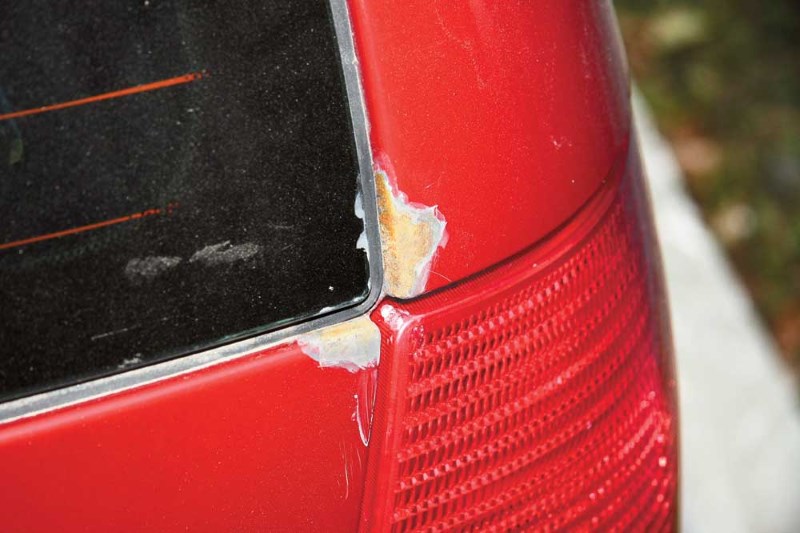
The peculiarity of chips on a car body is that even at a shallow depth they are large in area. If the depth is really small, that is, part of the paintwork is damaged, it is possible to remove the defect on the body by treating this point with an auto color-enriched polish, and a protective polish is applied on top of it. First you need to remove all dirt and degrease the work surface.
If the chip on the machine is so deep that it reaches the ground, let alone metal, it is impossible to eliminate it in this way, tinting will be required. It should be borne in mind that the chip removal technology is determined by the type of car paintwork.
Sealing chips involves the use of such tools and materials as a set of polishing pastes, sandpaper for wet grinding with abrasiveness P 1500 and P 2000, polishing machine, nitro putty, paint, varnish. If the chip has reached the metal, and corrosion begins to appear on the body, primer is required. Naturally, if we are talking about corrosion, then we are talking about the hood of the car, since the bumpers of most cars are made of plastic. Usually on the hood chips in the largest number appear on the leading edge.
Removal Technology
At the first stage of work, it is necessary to remove all dirt on the body by washing with detergents. Next, the damaged area of \u200b\u200bthe car is degreased. After that, in good lighting conditions, you need to inspect the car. Small chips that were not noticed initially can be detected.
Further, before starting to remove the detected defects, you need to determine what type of paintwork the car has. Allocate acrylic paint, acrylic paint under varnish, metallics. The first type of coating has Soviet and Russian cars and old foreign cars, the second type was painted by foreign cars of the nineties, it is still relevant to this day, with the exception of those models or trim levels for which metallics are provided.
When it is not known what type of paintwork this car has, you need to polish a small area of \u200b\u200bthe body with an abrasive paste with a white rag. If as a result of this the paint was removed, that is, it remained on the rag, then the car has an acrylic coating, otherwise there is a layer of varnish on top. Based on this, they acquire acrylic paint or a pigment with varnish, and after that they begin to remove chips. If corrosion is found at these points on the body, it must be removed with a sharp object.
Then it is necessary to remove some of the old paintwork material around the detected defects by grinding with P 1500 sandpaper so that the new coating, which will be embedded, adheres well to the original one. In addition, this will make the transition zone less noticeable.
Priming and painting
Places where corrosion has been removed on the machine must be covered with a primer. Termination begins with the extraction of an acrylic two-component primer from a can. It will be required for these works a few drops. Then you need to cover them with metal points with a thin brush or a sharpened match. After 10-15 minutes, it is necessary to cover the second layer. After that, they wait about 2 hours for the soil to dry, or accelerate it by warming up.
Next, you need to repair the damaged areas with paint. If the car is covered with acrylic paint, embedding is do-it-yourself. To cover the treated point with paint, they also use a brush or a sharpened match.
Previously, the material must be well mixed and the damaged areas on the machine repaired in several layers, since the paint shrinks strongly when it dries.
Embedding is carried out with interruptions of 10-15 minutes; upon completion of work, a tubercle of paint with a slight influx should be obtained.
The difference between coating with lacquer is that several upper layers are represented by lacquer. Moreover, it is applied 15-25 minutes after the paint, so as not to dissolve it, since the pigment dries slowly. At this point, this stage is considered complete. The next stage is passed after 2-3 days: it consists in grinding the tubercles. Preliminary, a nitro putty is applied around them with a soft spatula and left to dry. It will protect the adjacent paintwork from damage.
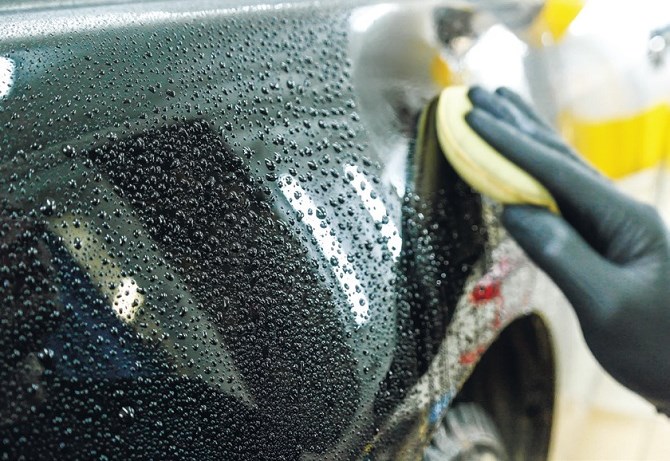
Grinding is carried out with P 1500 sandpaper. Its fragment should be stretched onto a wooden block the size of half a matchbox. In the process of work, it is necessary to constantly moisten both the abrasive material and the surface. When erasing putty, you need to apply it again after drying. The final processing is carried out with P 2000 sandpaper. At the end of these works, the hood will be covered with matte dots.
At the last stage, you need to smooth these places by sanding the entire surface of the part with P 2000 sandpaper. This also uses water, the result should be a completely matte surface that needs to be polished.
If the chip does not reach the ground, you just need to repair it with paint, and the shade can be selected according to the code. The paint should be poured from the original container into the lid and applied with a toothpick no higher than the varnish level. After an hour, you need to apply varnish on top of the paint with a brush. This will even out if the paint was applied unevenly. At the end of the work, it is necessary to grind the point using an abrasive ZM.
In order to visually see the implementation of the described work, you should watch the video.