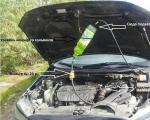
Diagnostics and replacement of the fan sensor on the VAZ 2114
Every driver knows that engine overheating is very bad. It can't lead to anything good. In order to protect the engine from overheating, cars are equipped with radiator cooling fans. And sometimes he is far from alone.
Today we will talk about a very important cooling element - the fan sensor. It is responsible for the timely activation of this cooling device, preventing unwanted overheating.
A bit of theory
|
Characteristic |
Explanation |
|
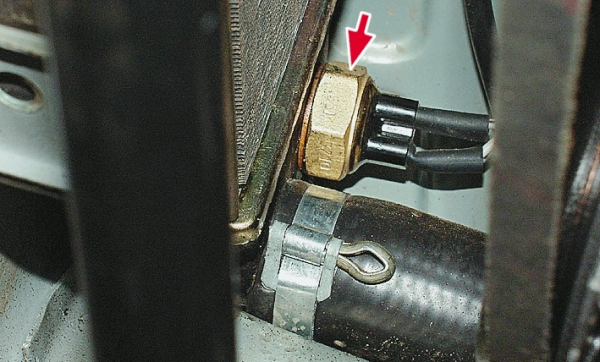
Location |
The sensor is located in the heater core. It is not difficult to determine that it is he who is in front of you, since in the radiator this is the only element to which the wires are connected. And if you take the key for 30, then only the sensor has the appropriate fastener size. |
|
Response temperature |
Sensors may have different temperature limits. But for the VAZ 2114, switching on occurs at 102-105 degrees Celsius, and switching off - at 85-87 degrees. When choosing a new meter, focus on the one that is out of order, or purchase with an on and off indicator of 102 and 87 degrees, respectively |
|
Operating principle |
Inside the sensor there is a special contact group. When the coolant in the radiator is heated, this group heats up and expands. When the expansion reaches a certain limit, the contacts close, they transmit a signal to the wiring and the fan turns on |
Causes of fan failure
There are a number of reasons why a fan sensor can end up failing in addition to the sensor. Therefore, they should first be excluded to make sure that the sensor is to blame.
The reasons for the failure of the fan include:
- The fan has failed. It can wear out, lose integrity, get mechanical damage. It will be more expensive to replace it compared to the sensor, but there is no choice.
- The chain broke. When checking the sensor, the method of closing its two contacts is usually used. But if the wiring circuit is damaged, this will not be possible, and the regulator will be blamed for inexperience.
If the contact test fails, the fan does not respond, try connecting its contacts directly to the battery.
Sensor test
Plus, be sure to check the new sensor before installing it. This will make sure it works. Today there are a lot of fakes on the market, so there is always a chance to purchase a low-quality fan sensor.
To check, you will need a certain set of tools and materials, which includes:
- Capacity;
- Water;
- Coolant;
- Thermometer;
- Multimeter.
Let's start checking.
- Pour water or normal coolant into prepared container.
- Lower the sensor into it with the threaded part.
- Connect the terminal of the multimeter to the contacts of the regulator. The meter must be in resistance measurement mode. Although if the multimeter has a dialing function, then choose it.
- Place a thermometer in the liquid.
- Heat up the water.
- When the liquid temperature reaches the regulator's response temperature (92 degrees Celsius), the contacts should close and the multimeter will start beeping.
- If this does not happen, the sensor is really not working and it needs a changer.
If you purchased a non-working regulator, be sure to go to the store and ask for a replacement or refund. But only with a check. It is better to purchase spare parts in specialized, good stores. There is less risk of being scammed.
Replacement
On an injection engine, which is literally full of all kinds of sensors, sometimes you need to pay attention to the fan switch-on controller. If the check showed that the device is out of order, there is nothing left but to carry out the replacement procedure.
The work involves the need for just a few tools and materials:
- Ring wrench 30 millimeters;
- Container for draining the cooling liquid;
- Dry rags.
Having prepared everything you need, you can start replacing.
The first priority is to let the engine cool down. Working on a cold engine is more convenient and safer. If hot coolant comes into contact with the skin, burns cannot be avoided.
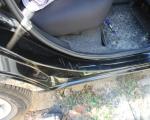
- For replacement, you do not need a viewing hole or overpass. For such work, these elements are not needed. A simple garage will do.
- Disconnect the negative terminal from the battery.
- Drain all coolant from the radiator. Do not drain the coolant from the cylinder block, this is not necessary.
- Remove the cap from the expansion tank of the cooling system of your injection engine.
- To drain antifreeze or antifreeze, unscrew the drain plug on the radiator. You will find it at the bottom of the radiator, and no tools are required for dismantling. The cork is easily unscrewed by hand.
- Substitute a previously prepared container under the drain hole, where the coolant will drain. Wait until fluid flow stops completely.
- If you want the same antifreeze then pour it back, take a clean container. If the coolant is old enough and needs to be replaced, then the cleanliness of the container does not matter.
- Screw the plug back in.
- Disconnect the contacts from the fan sensor.
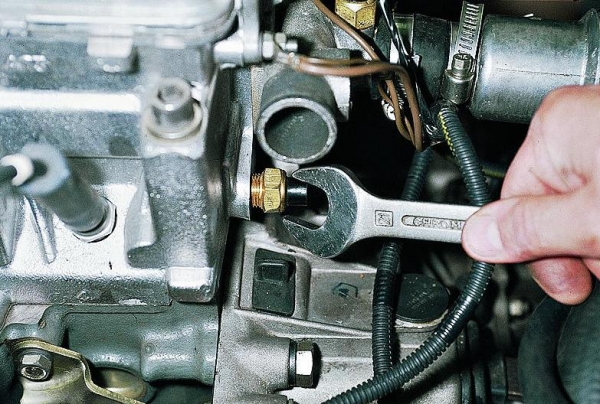
- Using a 30 mm wrench, the regulator is unscrewed.
- Turn carefully so as not to damage the plastic container of the radiator.
- Screw the new regulator in place of the old one. Be sure to insert the copper gasket under the new device.

- Reinstall the fan control wiring.
- Pour antifreeze or antifreeze drained in advance into the expansion tank.
- Purge the system to avoid air pockets inside the system.
- Replace the negative battery terminal.
- Turn on the power unit, warm it up for a while to make sure the new sensor is working.
- If, when heated to the desired temperature, the sensor does not work again, you should check the other elements that may be the cause of this behavior of the cooling system.
Replacement without coolant drain
If you do not want to spend a lot of time replacing the sensor on your VAZ 2114, you can do without the procedure for draining the coolant.
Replacing the fan switch-on regulator without a coolant drain stage requires experience and certain skills. Therefore, it is not recommended for a beginner to use this repair method.
- Using a 30 mm wrench, start unscrewing the old sensor, but not completely.
- Prepare a new sensor.
- With one hand, unscrew the old regulator to the end, and quickly insert the new one with the other.
- In this case, a certain part of the antifreeze will flow out, but this is not scary.
- After replacement, be sure to thoroughly wipe all areas around the regulator with a dry cloth.
- Check for leaks after installing a new device.
After completing work, wipe the vehicle thoroughly so that coolant does not remain on the engine and its components. This is especially true for rubber and plastic elements.