How to draw a line in word. How to make a line in Word
If you often work in Word, sooner or later you will need to create a horizontal line above or below the text. This is very handy when you want to make a template for a specific document.
There are many ways to do this in Word, but we will consider the simplest ways to solve this problem.
Horizontal lines in Word 2003
First, set the cursor to the desired location. Go to the "Format" menu and select the "Borders and Shading" item there. Select the desired line in the "Type" menu and click "OK". Now the line we have chosen will belong to the entire paragraph. If you only need a certain part of the row, then it is best to use cell insertion. There you will also need to mark the visible and invisible lines.
Horizontal lines in Word 2007 and above
In this version of Word, a horizontal line can be drawn in several ways. If you just need underlined text, then you can use the "H" button in the "Home" section. Simply and easily.
To create a line from top, left, right(vertical), you need to go to the "Paragraph" section and open the "Borders" menu. Here you can select the line you need, after which you can safely type text. It will be typed already with the line.
With this approach, it is important not to forget that the "Enter" key will remove the line. Therefore, you need to move around the document exclusively on the "arrows".
If you need a subline, but without text, you can do it simply by holding down the "Shift" key while pressing the required number of times on the "-" key. You will get a line like "______" without text.
Now you can draw horizontal lines in Word.
Not infrequently, when designing text documents, it becomes necessary to draw a line, for example, in order to separate one part of the text from another. In the Microsoft Word text editor, there are several options for solving this problem at once.
In this article, we will look at three of the easiest ways to draw a line in Word. The material will be relevant for all modern versions of Word. Including Word 2007, 2010, 2013 and 2016.
Method number 1. Inserting a dash or underscore.
Perhaps the easiest way to draw a line in Word is to use the dash or underscore. By inserting a large number of such signs in a row, you will get a horizontal line. For example, to draw a line using a dash, just hold down the CTRL key and without releasing it, press the minus key on the additional keyboard block. Then hold this key combination until you get a line of the length you need.
In a similar way, you can draw a line using the underscore character. To do this, hold down the SHIFT key and the key with the underscore sign. Then you need to hold these keys until a line of the length you need is drawn.

This method of creating lines is convenient because such a line is easy to draw and easy to delete. If the line is not needed, then it can be deleted in the same way as any other text.
Method number 2. Inserting a finished line.
Another way to draw a line in Word is to use the button to create borders. This button is located on the "Home" tab and it allows you to quickly draw a line anywhere in the text. All you need to do is to place the cursor where the line should be, click on the button and select "Horizontal Line". As a result, a horizontal line will be drawn at the selected location on the page.

The advantage of this method is that the line drawn in this way can be changed. The line can be made thicker, thinner, longer or shorter. To do this, the line must be selected with the mouse, after which its size can be adjusted by moving its corners. In order to delete such a line, you just need to select it and press the Delete key.
Method number 3. Inserting a figure.
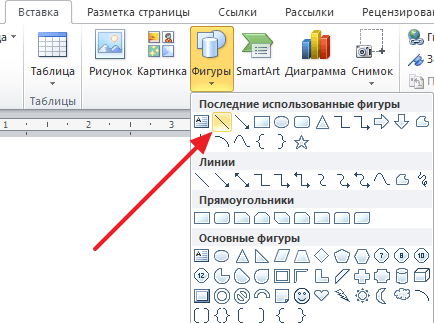
On the "Insert" tab there is a "Shapes" button, with which you can insert various shapes into the document. Among other things, there is a figure in the form of a line. In order to insert it into the document, click on the "Shapes" button, select the line and draw a line in the document of the length you need.
The advantage of this method is that such a line can be placed at any angle. In order to delete such a line, you just need to select it with the mouse and press the Delete key.
As you probably already understood, the Word text editor is a multifunctional program, and, perhaps, at first it is very in vain underestimated by many users. Of course, in some moments it is still better to use the same Excel, but, in general, Word is able to cope with many tasks.
With its help, you can always beautifully design a document, giving it a deliberate businesslike quality, or vice versa, making it informal. You can work with tables, change the text style, etc. In addition, the Word interface is thought out to the smallest detail, it allows you to find the necessary tool for work in a matter of seconds. By the way, in Word you can even draw a line if you suddenly need it. Actually, we will talk further about how to draw a line in a Word.
Method one
In fact, in almost any controversial situation that arises in Word, there are several options for getting out of it. And this is very good, because each user can choose what he likes and suits him the most. So, let's start with the first method, in my opinion, very simple and understandable to everyone.
Imagine that you have typed some text, and you need to highlight it with an underscore. To do this, we do this: select the text, then in the "Home" tab on the toolbar we find the "Font" block. There are three buttons: bold, italic and underline, and if you still need it, then this can be done through another menu. Accordingly, just click on the last button, as shown in the screenshot below.
Method two
This method is even more functional. It is useful in those situations when you want to draw one or more lines in any area of the sheet, and it doesn’t matter if it is horizontal, vertical, across, or something else. Do this:
- There is an Insert tab on the toolbar, open it.
- There is an "Illustrations" block in which the "Shapes" button is provided.
- By clicking on it, find a straight line among the proposed ones. Click on it at the moment when it becomes necessary to insert a line into the text. Please note that you will have to specify two points: the place where it will start and where it will end.

Method three
This text editor provides another tool that is useful for quickly creating lines. To draw a line, place the cursor in the right place, then click on the "Borders" button, which is located, again, in the "Home" tab. After that, a horizontal line should appear across the entire width of the sheet. 
I hope you liked one of these ways of drawing a line in Word. Choose any and feel free to experiment!
When you work with the Microsoft Word program, you may very often need various separators in the form of lines. In this article, we will tell you how to make a line in Word in various ways.
1. The easiest way is to make an underline. To do this, go to the "Home" tab and click on the icon with the letter H. This will activate the text underlining. After that, all selected text will be underlined from below.

You can also "underline" an empty area. To do this, activate the text underline icon (letter "H") and press the Tab key on the keyboard several times.
You can set the type of underline and choose its color.

2. Also a very simple way and effective. To do this, just hold down the Shift key and press the space bar.

3. To draw a full-width line above or below a line, you can use the border tool, which is more commonly used to set page borders. The line can be either horizontal or vertical.

4. If you need to underline in various forms or complex texts, tables should be used. You can set them up so that one part is invisible and the other is set to underline.

Click on the table and select Borders and Shading. Set up the table so that some lines are visible and others are invisible
5. You can simply draw a line in Word. To do this, go to the "Insert" tab and in the "Shapes" column, select the "Line" item. To make the line horizontal, hold down the Shift key.

Lines in text documents are often used to underline, emphasize information, create a blank line, fill or define text. And how to draw a line in Wordp is a fairly common question, which is difficult to answer. First you need to decide what exactly you need.
There are three main options for how to make a straight line in Word, each of which can be useful in different situations. Ways to remove straight lines depend on the chosen way of creating them.
First way
Perhaps a situation has arisen when you don’t know how to draw a line in Word, simple, solid, in the middle of a line. Most often, when you need to leave an empty space in the text in order to fill in the data by hand later. This applies to letterheads, contracts and acts.
On the keyboard, find the “-” key and press it simultaneously with the “Ctrl” key. The result is a small straight line. If you repeat this operation many times, then you can "stretch" it to the width of the entire page. When you reach the margins, move to the second line.
How to remove a line in Word created in this way? It is also quite simple - we exploit the "Backspace" key.
Second way
Do you need not a horizontal line, but a vertical or oblique one? How to draw a line in Word, which tool to use? A straight line created as a figure is easily executed.
You can draw a straight line using the second method absolutely in any corner of the sheet: parallel and perpendicular to the text, at an angle. To do this, you need to take several steps:
- Go to the special section "Insert", select the command "Shapes".
- Click on the straight line icon.
- Click the mouse at the start point on the sheet, instead of the cursor you will see a cross.
- Move the mouse in the direction you want while holding the left button.
- Release the button at the point where you want to end the line.
In the same way, you can draw arrows, curves, wavy and so on. Subsequently, you can change their appearance, width, color and other parameters. If you accidentally stopped earlier, you can lengthen the straight line: to do this, press the circle on the tip and drag it to the desired size while holding the left button.
How to delete a line in Word, made as a figure, if, on the contrary, it is not needed? Any shape can be removed by selecting it with the mouse, then pressing the "Delete" key or selecting the "Cut" button in the toolbar. To select, just click on it anywhere.
Third way
How to make a line in Word at once the entire width of the page? There is another nice handy button in the editor's main menu. In order to use it, you need to place the cursor in a suitable place, then find the "Borders" button in the panel. You can remove the extra border by operating the same button by clicking on it to deactivate it.

To create underlining, columns, lines in a text document using the Microsoft Word application, there are several options. Each of them is convenient, simple, practical for different situations and requirements. It is easy, on the contrary, to remove unnecessary elements and underlining. It remains only to decide which of the instructions is right for you.


