Light in the trunk of a vaz 2114. How to make additional lighting in the trunk of a vaz
As you know, Russian developers cars they are, to put it mildly, indifferent to the lighting of the trunk, as a result of which the owners of VAZs of various modifications with good reason remember with an unkind word about the dim light that does not allow you to see anything, the unsuccessful wiring diagram from the dimensions, the inconvenient placement of the ceiling and other disadvantages inherent in lighting trunk of almost all VAZ models. Meanwhile, nowadays there are many ways to solve this problem and if desired and with minimal skills practical work almost any motorist can handle it.
Having decided on a similar and, in general, simple revision, first of all, you should decide where you will get the + 12V necessary to power high-quality lighting. The easiest way is if your car is quite “fancy” and in the trunk itself there is already the desired voltage involved in the security alarm or, say, in the subwoofer (to avoid trouble, we protect the positive line from such systems with an additional fuse). Otherwise, you will have to use the power supply going to the ceiling lighting (the nearest standard point with a connection via a white-red wire), which, however, does not complicate the task too much. The wire from the interior ceiling to the trunk can be hidden and easily stretched under the roof lining and behind the plastic lining of the rack.
With a "minus" it's even easier - and you can take it from any bolt in the trunk, the main thing is not to be too lazy and ensure reliable contact by cleaning the metal at the junction.
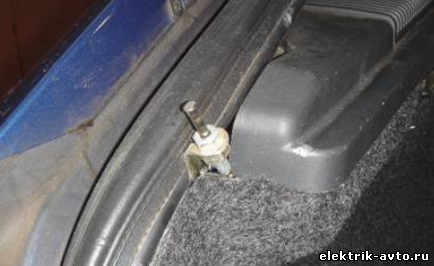
As for the limit switch, designed to turn on the trunk lighting when its lid is opened, it will suit anyone, only the excessive “squeakiness” of some not very successful samples should be taken into account (as a rule, this applies to door switches).
At the next stage, we choose the lighting option and the place to place the light source (in any case, the original version clearly does not suit us, otherwise, why bother to start all this ...). In particular, you will have to solve the important issue of creating a backlight in such a way that it does not interfere with removing the shelf:
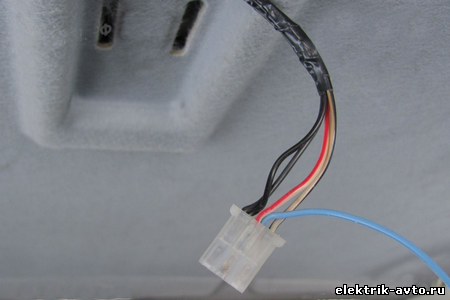
The easiest option is to embed a technological connector that allows you to quickly disconnect and connect wires if necessary. This method attracts with its unpretentiousness, but it is associated with the danger of breaking the connector through negligence or ignorance (by an outsider).
The second, more civilized approach involves the use of a "simple" contact group, such as spring type (with a contact plate on the shelf). In the absence of such an element, it is easy to create a reliable detachable connection on your own, from improvised materials.
With both options, for laying hidden wiring, it is necessary to drill a hole in the corner of the mounting loop and use a piece of hard wire to stretch the wires behind the soft sheathing. If desired, the circuit can be supplemented with a toggle switch to force the lighting to turn off (for example, in the daytime).
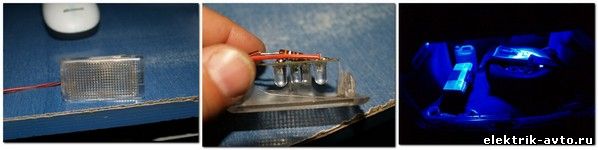
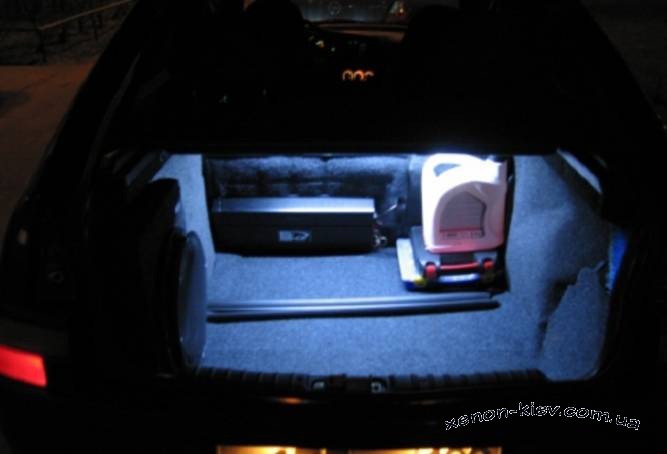
Cabin ceiling from VAZ 2108-15
The light from this ceiling is beyond praise. You can fix it on a shelf or in any other convenient place using Super Moment glue or its equivalent. In the case of using a shelf as a basis, do not forget to take care of the possibility of quickly disconnecting the chain according to one of the above options.

As an analogue, you can use a ceiling lamp from any foreign car, for example, from a Mercedes 190E, replacing the standard bulbs with brighter LEDs.
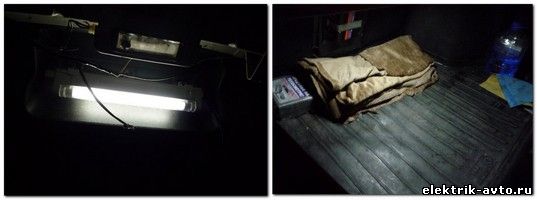
Lamp daylight with invector
When choosing this light source, in addition to the lamp, as such, you will have to additionally purchase the following components:
- Autoinvector;
- Auxiliary relay;
- Fuse.
The light with this option is quite decent, however, according to some reviews, it starts to falter at sub-zero temperatures (it starts up for a very long time and works unstably).
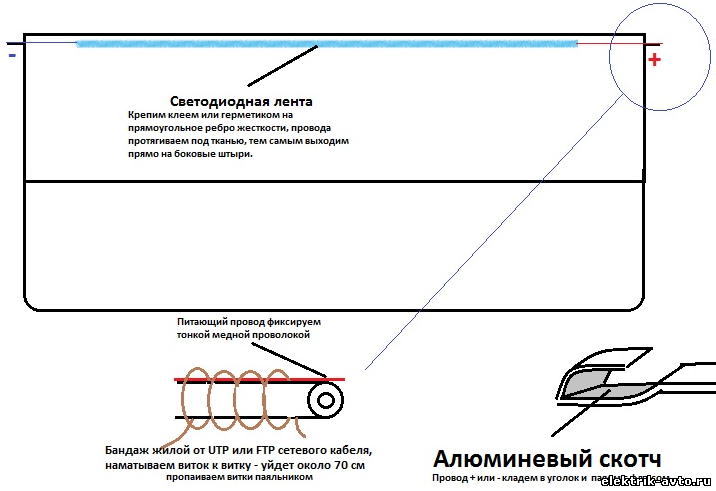
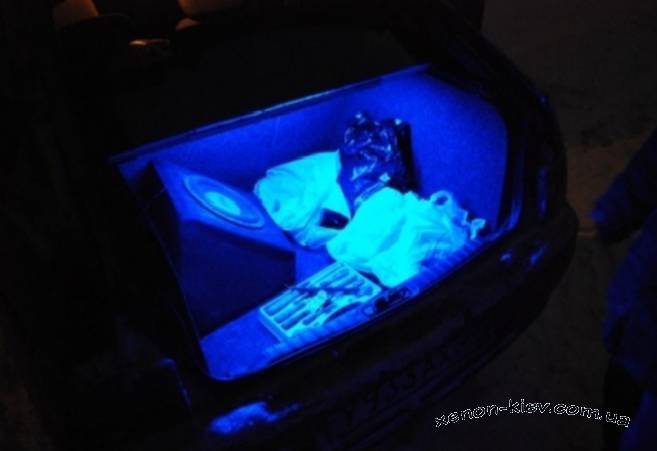
Trunk lighting based on LED strip
Extremely affordable, simple and effective type of lighting. The tape is attached in any convenient place with glue, and in this case, the main thing is not to make a mistake with the multiplicity of the number of LEDs used.
From the dimensions and it is very dim, it is impossible to really see anything. In this article we will install additional lighting in the luggage compartment. In order to carry out such tuning, we need to find a current source with a constant voltage of 12 volts. First of all, you need to make sure that there is no already conducted source in the trunk of the VAZ 2112, for example, from an alarm, an amplifier, etc.
If not, the nearest 12V DC wire is in the dome light and is red/white. In addition, it can be powered from the clock, cigarette lighter, etc. In our case, we take the current from the interior ceiling light. We stretch the wire along the roof, for this you will have to unfasten the back of the roof upholstery and bring it out behind the plastic overhead rack. The mass can be found anywhere, we fix the negative wire to the nearest body bolt. It is necessary to make lighting so that you can remove the shelf. The first way is to make a connector and disconnect it while removing the shelf. The second way - we simplify the connection of contacts, we create a kind of contact group. In order to conduct the wiring to the contacts discreetly, we make a hole in the corner of the sidewall mounting loop and pull the wires from the inside, behind the soft lining. Alternatively, we take the plus from the amplifier, using a fuse, and put the minus on the wire of the limit switch. It turns out that when we open the trunk, the light turns on, and when we close it, it turns off.
Instead of a regular light bulb, you can use an LED strip. The lighting turns on when the lid is raised, in addition, we install a toggle switch that allows you to perform a forced shutdown. Now let's look at the example of installing daylight in the trunk with an autoinfertor. We purchase an auto-inverter, relay, wiring 3-4 m long and 0.75 cross-section (not single-core), a fuse and a salon button. We install an inverter and a fluorescent lamp in the luggage compartment, then insert the plug into the inverter and admire the lighting. You can also install a salon ceiling from the VAZ 2108-15 in the trunk of the VAZ 2112. We put the ceiling and wire fasteners on Moment glue. For the convenience of disconnecting the wires when removing the shelf, we install a connector. We lay the positive wire from the mounting block along the left side of the floor, under the carpet. Already from the factory, one red-white wire is connected to the “Sh4-14” contact, power is supplied through it to the standard ceiling of the salon and individual (navigator's eye) lighting. We attach these two wires, having previously put a tip on them. We connect the negative wire to the trunk opening limit switch from the alarm. The last option is to install the LED tube in the trunk of the VAZ 2112. During operation, we use heat shrink - this is a tube for insulating the junction of the wires. In the case of its use, you do not need to mess with electrical tape, which provides insulation is extremely unreliable. Any transparent tube with a diameter of 10 mm can be used. In order to avoid the appearance of light spots, we tilt the edge LEDs.
The trunk lighting of a VAZ 2112 car works on dimensions, but it is dim and poorly illuminates the trunk. In this article, we will install the second lamp in the trunk. In order to do this tuning, we need a power supply with a voltage of 12 volts. First you need to check if there is an already connected power source in the trunk of the VAZ 2112, for example, from an alarm, an amplifier, etc.
If not, then the nearest wire with a voltage of 12V is located in the ceiling light, it has a red and white color. In addition, we can be powered by a watch or a cigarette lighter. In our case, we take power from the interior ceiling light.
We will stretch the wire along the roof, for this we will have to unfasten the back of the roof trim and bring the wire behind the plastic decorative rack. Mass can be taken anywhere.
Additional light needs to be done so that you can remove the shelf:
- 1st method - make a nest and turn it off while removing the shelf
- 2nd method - we simplify the connection of contacts, we create some kind of contact group.
In order to bring the wiring to the contacts discreetly, we make a hole in the corner of the sidewall mounting loop and tighten the wires from the inside, behind the skin. Alternatively, we take the plus from the amplifier, and use the fuse, and put the minus on the limit switch wire. It turns out that when we open the trunk, the light turns on, and when we close it, it turns off.
Instead of a simple light bulb, you can take an LED strip. The lighting will turn on when the trunk lid is raised, we also put a switch that will turn off the light when the trunk is open.
How to install a fluorescent lamp in the trunk of a VAZ
To connect daylight, we need an auto inverter, a relay, wiring 3-5 m long and 0.7 cross section (not single-core), a fuse and a button in the cabin. We install an inverter and a fluorescent lamp in the luggage compartment, then insert the plug into the inverter and admire the lighting. You can also put the interior ceiling of the VAZ 2109-15 in the trunk of the VAZ 2110.
We put the ceiling and fastening wires on glue. For the convenience of disconnecting the wires when removing the shelf, we install a socket. We will lay the positive wire from the mounting module along the left side of the floor, under the carpet.
1 red-white wire has already been connected to the “Sh4-14” contact from the factory, through it the power goes to the usual interior lighting dome. We attach these 2 wires, having previously put a cambric on them. We connect the negative wire to the trunk opening limit switch from the alarm.
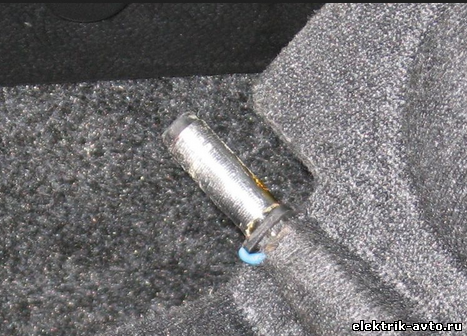
Installing an LED tube in the trunk of a VAZ 2112
Another option is to install an LED tube in the trunk of a VAZ 2112. During operation, we use heat shrink - this is a tube for insulating the junction of the wires. If you use it, then you don’t have to mess with electrical tape. We take a transparent tube with a diameter of 10 millimeters and insert a tape with LEDs into it. We fix it in any convenient place, we take power from the nearest wiring as described above. In order to avoid the appearance of light spots, you need to tilt the last LEDs.


