Drawing the human body. The proportions of the human figure
Good weather for plein-airs is gradually coming on the street, which means a great opportunity to draw people and objects in motion. Many avoid this as too much of a challenge, but there are a few tricks that make it easier to draw anything in motion.
1. Start with simple tools. To draw cool sketches, you only need a simple pencil and an eraser. You can add colors and watercolor pencils and a waterbrush are very useful here - with their help you can create interesting effects with maximum convenience.

2. Observe your subject for a while before you start painting. Look for characteristic repetitive poses. Try to understand how long your object will stay in each position. Start in the upper left corner of the sheet and draw quick thumbnail sketches of each of the most characteristic poses. Feel free to erase, just outline the light and approximate direction of movement. Each sketch should ideally look like a snapshot so you get key poses and range of motion.

3. Study the structure. If you want to easily draw poses and movements, the practice of copying simplified skeletons and structural diagrams of people and animals will come in very handy. You need to know the basic forms of the skeleton. You can study skeletons from books (Bammes), or you can go to a museum and draw from life, this is the only way to get an idea of three dimensions. When you draw someone, switch your eyes to "X-ray vision" and imagine how the skeleton inside behaves.

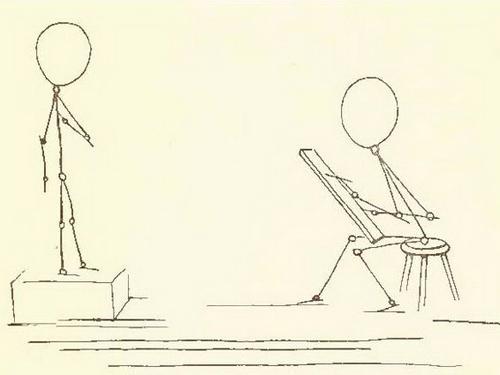
4. Begin by drawing people or animals that are in one pose. If you have a cat or a dog, you're in luck, the perfect subject for drawing is in front of you. Sleeping objects are the easiest to draw, but even they gradually change pose. Once you grasp the meaning and study the shape, it will be much easier to draw the same dog in motion.

5. Stay inconspicuous. As a rule, people, seeing that they are being drawn, begin to take strange poses or freeze on purpose. Try to capture the moment when no one sees you - this way you get a completely natural moment for drawing.

6. Draw musicians! Often they are in a fairly static pose, plus you get an interesting tool to boot.

7. Try using the frame-by-frame video effect. If you're dealing with fast action, here's a tip for making your eyes work like a high-speed camera. When you look at your subject, close your eyes from time to time. The last pose you see will be in your short term memory for a few seconds. Over time, you will learn to remember more detailed information about the pose.

8. Train your memory. Knowledge, memory and imagination are closely related. You can make the most progress when you alternate between observing, studying books, and drawing from memory. You can draw an animal from life and then draw that pose later in your sketchbook just from memory.
Even if this memory sketch doesn't look good, it helps you come face to face with what you know and what you don't know. You can then fill in the gaps in your knowledge by drawing an animal from a photograph, for example.

9. Draw friends in cafes and restaurants. At the restaurant, you will have about 15-20 minutes after you order your food while you wait for your food. You are usually in a well lit area and have a comfortable desk at hand. Try to capture the features of the person you are drawing. As he speaks or gesticulates, think about what posture is most typical for this person.

10. Visit zoos and farms to draw animals. Zoos provide a great opportunity to sketch animals that would be difficult to observe in the wild. Animals often return to the same poses or movements, so you can spend more time on your sketch.

On my own, I can also add that drawing people in different poses is a great help for the base lines of movement.
Tatyana Abuyanchikova
Almost all children draw, as they like and with anything. Some more, others less. Interest in drawing in children appears early, and their pictorial activities cover a variety of topics. Even scribbles contain quite specific information and meaning for a small artist.
We already know that children 6-7 years old already know how to portray a person, i.e. they were prepared by previous work when they learned to draw a figure person in the senior group. But mostly in the drawings of children, people stand, helplessly spreading their arms and legs apart. Of course, pictorial by the age of seven, children's activities become more complex and detailed, they can already create a planned composition, but free choice of content Images, when reflecting children's ideas about people's lives, it can be difficult if the child does not own the methods and techniques images of a human figure in motion. Image of a person in motion- the most difficult to develop pictorial creativity of preschool children, this process is complex and painstaking, requiring the teacher to create the necessary conditions for children's creativity. And in order for the child to be able to convey what was conceived, he must own visual and technical skills.
Target: The development of artistic and creative abilities of children in the process of learning techniques.
Tasks:
To form the ability of children to draw a figure man in motion respecting the proportions of the body and its parts.
Teach how to create a dynamic image using a figure model human changing the position of the arms, legs and torso.
To develop children's creativity in the ability to create expressive images in the drawing.
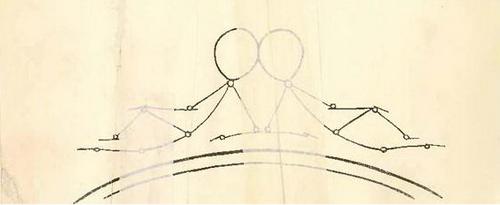
To implement my technique, we need a drawing stick, which can be made from improvised material, I made it from a stack, paint and a cardboard model human.

Methods, techniques, and ways of directing work
At the first stage, we start with
laying out "models human» on the table.
Wherein man can give different
the position of the arms, legs, torso.
So with the help of the model, the child understands
which, depending on the type movement is changing
whole body position. Man comes alive before our eyes
At the next stage, the child is invited to transfer these movements on a sheet of paper with "drawing sticks". Children correlate image with laid out model human, while trying to more fully convey the characteristic features depicted person - pose, movement. The model laid out by the children plays an important role here. human.

After the children have experienced images of a person in motion"drawing sticks" You can offer classes on a variety of topics. And as a result of systematic and systematic work, children will have the desire and ability to qualitatively and expressively depict a person in motion.

Drawing a person can be the most vivid and profound experience in an artist's life. Today we have prepared for you tips from the famous Italian artist Giovanni Civardi from the book Drawing the Human Figure. Let this knowledge become a source of inspiration and creative stimulus, helping to convey mood and memories in the form of a drawing.
You can draw a human figure and a portrait with any materials - from pencils to watercolors. The pencil is the most common tool due to its low cost and versatility. Charcoal is great for fast drawings with strong tonal contrast and less suitable for fine details. Thick and smooth paper of good quality is recommended for ink. Mixed media is the simultaneous combination of different materials in one drawing.


Experiment to find your own techniques that will achieve the most expressiveness, and try to take advantage of random effects.
Fundamentals of plastic anatomy
Artists study anatomy in order to make meaningful representations of the human figure. To reproduce it reliably, you need not only to see, but also to understand what you are drawing.
Thanks to the knowledge of anatomy, the image becomes more convincing and alive than nature itself.
In general, the shape of the body is determined by the skeleton as the main supporting structure, the muscles that fit it, and the upper layer, consisting of a fatty cover. It is useful to know and remember the relative sizes of the articulating bones and their proportions relative to each other and the entire skeleton, because without this information it is impossible to “transfer” the figure to paper and acquire the skill to depict it logically and consistently.
Below are the main bones of the skull and neck, along with skin, cartilage, fat, muscle, hair, and more, in layers.

The skeleton of the male torso, enclosed in the contours of the body, in the frontal, lateral and dorsal planes. These drawings will help expand your understanding of body shape.

Upper and lower limbs in different planes. As in the previous figure, the skeletal structure is shown inside the outlines of the body.


It is important for an artist to consider three main aspects of muscles: their appearance (shape, size, volume), location (where it is in relation to the skeletal structure and adjacent muscles, how deep or superficial) and its mechanism (function, direction of muscle pull, corresponding changes in shape and etc.).

Proportions
In order for the drawing to come out believable, it is necessary to take into account the proportions of the body and head. The height of the head from the forehead to the chin is often taken as a unit of measurement for determining the proportions of the body. The growth of a standard figure is approximately 7.5-8 goals. Remember a few more proportional relationships: the head fits into the total height of the body with the neck three times, the length of the upper limbs is also three heads, and the lower ones are three and a half.

Despite the differences between individual individuals, they can be divided into three main groups of types with similar characteristics within each - ectomorphs, mesomorphs and endomorphs.

Hands and feet
It is easy to understand why the hands and feet, with their arrangement and variety of possible gestures, are considered the most difficult parts of the body to convincingly reproduce, both in drawing and in painting and sculpture.
Drawing your hands and feet is the best way to study them in as much detail as possible. You will be able to make sure that quite worthy studies are obtained, comparable to face drawings, and maybe even more expressive.

First, a quick (but diligent) sketch is performed in the desired angle and pose, then with the help of its “geometrization” the necessary anatomical information and volume are transmitted, after which the details and individual outlines are refined.

As well as for the head and body, knowledge about the structure of the bones of the feet and hands will be useful.

Draw your own hands and feet in different positions. You can use a mirror. Take different objects in your hands and convey the dynamics and mood of the gesture in the drawing.
Head, face, portrait
The main interest for the artist has always been the face and figure. A portrait is not just a reproduction of physical features for the purpose of recognizing a particular character. This is a story through facial expressions about his personality, thoughts and emotions.
How to draw a head and facial features, we described in detail in the article.
Outline of a person in a sketchbook
A sketch is a quick, spontaneous drawing from life, made in a short time with several informative lines. Drawing people in a natural setting, who do not pose on purpose and probably do not know that they are being viewed and depicted, will seem difficult at first. But there is no real reason to be afraid or lost - hardly anyone will pay attention to what you are doing.
The ability to portray strangers in any position and under any circumstances is important for the development of technical skills and value judgment. And, of course, the regular practice of sketching will hone the gift of observation and interpretation, teach you to look deeper and make quick, confident, understandable and accurate decisions.

A few quick tips on how to sketch from life:
- Get in the habit of always carrying a pencil and a small sketchbook—one that fits easily into your bag or pocket—in case something catches your eye or seems interesting.
- It is worth striving to increase observation and the ability to isolate the main thing and at the same time coordinate visual perception, value judgment and hand movements during the execution of the drawing.
- Do not try to reflect on paper everything that you see in nature. Given the limited amount of time and the risk of changing the pose of the model at any second, focus on the essentials.
- To learn how to use your memory to reproduce the sequence of basic phases of movement, you will need maximum concentration in observing people.
If you are still confused by the thought of drawing people from life (note that if someone notices what you are doing, some may be flattered and others will leave in displeasure), drawing statues can help prepare for this mentally and gain some confidence. and sculptures in museums or monuments in public places.
Check if the museum allows you to sketch, and if so, feel free to go there and sketch the sculptures from different angles.

This is how they teach drawing in Paris - in the courtyard of the Louvre with sculptures.
Stages of drawing
If you are drawing a whole figure (clothed or naked), you can first draw some quick, light lines to outline the space that it will take on a piece of paper (maximum height, maximum width, etc.). Then outline the main parts of the body (head, torso and limbs) taking into account relative proportions.


Finish the drawing with essential contours, shadows and details that cannot be left out. Erase guide lines if needed.

In the book "Drawing the Human Figure" each section is analyzed in as much detail as possible, there are detailed images of the human skeleton in different planes. It is described in detail how to draw a figure of a man, a woman, a child, an elderly person, how to depict a nude and a person in clothes.
Man is the most amazing and unique creature in the world. And also one of the most beautiful. This is evidenced by the fact that images of men or women are present in almost every known painting related to the masterpieces of fine art. About how to draw a person: mom, dad or himself, the child thinks from an early age. Some children are inspired to draw circles and squiggles on their own, others require training.
They teach how to draw a person, starting from the younger preschool age. The first sketches of babies resemble scribbles. If a child constantly trains, then in the preparatory group he is able to quickly draw a person in different poses. It is wonderful if at the same time the young artist conveys facial expressions, portrait resemblance and individual characteristics.
The task of teachers in general education and art schools is to teach how to draw the human body in accordance with the anatomical structure. To do this, several hours in the program of the training course are devoted to academic drawing. The best learning effect is the implementation of sketches from nature.
You can learn how to draw people well at home on your own. For a beginner, all options are good: an image from a photo, video tutorials, the use of paintings and reproductions for sketching, the main thing is to choose a drawing technique to your liking. Many aspiring artists always take a sketchbook with them and make sketches in 5 minutes at any time. If you don’t feel like doing sketches on the street, you can draw relatives and friends, your reflection in the mirror.
From this article you will learn
How to build an image of a person using geometric shapes
The methodology of the lesson on a given topic in kindergarten is based on the similarity of certain parts of the body with geometric shapes. So, the head of babies is round, in adults it is oval, legs and arms look like rectangles, etc.
You can make a silhouette of a person from any shapes - circles, rectangles, squares.

To solve this problem, the preschooler is given paper or cardboard blanks, and he draws up a layout according to a given scheme or comes up with his own sketch. A more difficult task is to draw a person on your own using geometric shapes.
Step by step drawing of a standing person
Children 6-7 years old are already familiar with the basic drawing techniques. They learned to portray a person in full growth, waist-deep, in a static pose and in motion. Drawing from nature begins in the preparatory group and in the primary grades. As an auxiliary material in the lesson, you must have reproductions of paintings, photographs, samples of work. Before class, it is advisable to talk with children about the beauty and aesthetics of a person, about the fact that any of us is beautiful and unique.
Step 1
As usual, the construction of the figure begins with a simple pencil sketch. First, they look for the correct location of large parts on paper. Then comes the image of an oval head and a torso, consisting of two trapezoids touching at the waist.

Step 2
From the upper corners of the large trapezoid, you need to draw the lines of the arms, and from the bottom of the small trapezoid, the lines of the legs. A common mistake is the same length of arms and legs, you need to pay attention to children that the upper limbs are shorter.

Step 3
The next step is to give volume to the limbs. Shoulders, forearms, thighs and shins are depicted as elongated ovals, tapering downwards.

Step 4
A difficult task for a preschooler is to draw hands and feet. Therefore, fingers with a palm are often recommended to be depicted in the form of mittens, and the lower part of the leg in the form of a triangle. But some children are persistent and want a real realistic drawing, they can be explained how small details are done.

Step 5
At the next stage, extra lines are removed and the silhouette is completed. The sketch of the figure is outlined with a pencil, the head is connected to the body. They add a characteristic detail - the ball in the boy's hand.

Step 6
Now the little man needs to be dressed, then draw the growth lines of the eyebrows, outline the location of the nose, eyes, mouth.

Step 7
A light pencil drawing is completed with detailing of clothing and footwear, facial features. Hair is depicted with broken lines.

Step 8
To get a natural skin tone, use beige or orange. When coloring, do not press hard on the pencil.

Step 9
When painting clothes, it is better to use different shades of the same color, highlighting light and shadow, so the drawing will be more vivid and realistic.

Preschoolers need complete freedom in creativity. There is no single and correct drawing option; you cannot correct the child’s work if he wants to act in his own way. The right solution, if necessary, can be found through conversation and leading questions.
How to draw a person in motion
Middle school students know a lot about the rules for arranging an object in space, taking into account perspective. For students in grades 5–7, it is advisable to start a drawing lesson with an analysis of the structure of the human figure. This is necessary in order to correctly convey the proportions in the drawing, professionally depict body parts, otherwise the real person in the picture will resemble a mannequin. Despite the fact that anatomy is studied later, at this age, children already have an idea of \u200b\u200bthe skeleton, muscles and joints.
The first step in the phased construction of a sketch is the definition of proportions. In adults, the length of the torso from the crown to the hips is usually equal to the length of the legs. The height of the head fits into the distance from the chin to the beginning of the thigh about 3 times. In children and adolescents, this figure is less. The length of the legs of a harmoniously built person is equal to the height of the head multiplied by 3.5–4.
You can depict a person depending on the angle or location of the object and the artist. The main positions are in full face, when the sitter is facing the viewer, in profile - when the depicted is located on the side, half-turned or half-faced, in which the face is not fully visible.
Step 1
The pencil drawing begins with a sketch of the head and torso in the foreground. The spine is the basis of the whole figure, it can be outlined with a curved line. Large joints of the shoulders and pelvis are schematically depicted in circles. Sketch lines are drawn easily, without pressure.

Step 2
The next step is to draw the upper and lower limbs. The elbows are at waist level, the length of the humerus is equal to the length of the ulna, the knees are in the middle of the leg. The more accurate the sketch, the better it will be possible to convey the movement.

Step 3
Now you need to build muscle. The most voluminous part of the forearm, thigh and lower leg is located in the upper third, closer to the joint, the limbs gradually narrow. The body is easier to depict in the form of two ovals.

Step 4
Particular attention is paid to the hands and feet. They are also depicted schematically, imitating the skeleton of the limbs. The foot should be longer than the hand.

Step 5
After drawing all parts of the figure, the extra lines are erased. The silhouette is given the necessary outlines: sharp corners are smoothed out, the sides become sloping, parts of the body are connected by curved lines.

Step 6
When depicting a face, proportions must also be observed. The height of the forehead is equal to the distance from the eyebrow line to the tip of the nose and from the tip of the nose to the chin. The distance between the eyes is equal to the length of the eye. The ear is depicted just below the eyebrow line. To make the girl smile, the corners of the lips need to be slightly raised. At this stage, you can sketch the hairstyle.

Step 7
The more details in the drawing, the more realistic it will be. You need to draw clothes, shoes, accessories and other elements that create a vivid image. Strands of hair can be distinguished by separate lines.

Step 8
You can color the drawing using colored pencils or paints.

Drawings of a person in full growth for sketching
Here you can download people templates and use them for sketching (click on the picture - it will enlarge and download):


Drawing is a very laborious process. For some it comes easy, for others it is difficult. The most difficult thing in drawing people is not a portrait at all, but an image in motion. on the move, you'll find out right now. Displaying the correct proportions of the body on a piece of paper is not an easy task. To do this correctly, it is best to observe the actual movements of a person or ask someone to pose for you in the desired position. The most difficult thing in drawing a person in motion is the position of his shoulders, neck, hands and feet. Drawing the correct location of the knees and elbows can also be difficult. If at the moment it is not possible to observe the movements of a person in reality, try to follow your movements in the mirror or turn on the video. You can also watch people on TV, especially if it's a sports channel.
in move?
Our recommendations will help you to draw a person in motion step by step. Pay close attention to every piece of advice in this article.

Drawing the position of a person with thin lines
First of all, you need to make sketches. Step back from the top, bottom and along the edges of the sheet a few centimeters so that the person you draw is strictly in the center. Draw a circle or oval where the head will be. In the drawings presented by us, the sketches of the image of a person do not have shoulders. Pay attention to the last picture. The position of the shoulders is better to indicate immediately. The sketch lines should be barely visible, you will erase them later. It is enough that these lines are visible to you. Don't press too hard on the pencil.
The line coming from the head will reflect the position of the human body. The lines on the sides should repeat the position of the hands. The bottom lines follow the position of the legs. Pay attention to how the knees and elbows are bent in your sketches.
Draw a person in motion
You can draw a person in motion with a pencil by making all the necessary sketches. On them we begin to draw the smallest details, namely: the muscles of the feet, thighs, calves, head, shoulders, etc. The person should not turn out too thin, pay attention to this. Imagine that all the sketches are the skeleton of your person. The line of the body is the spine, and the rest of the lines are the bones. Your task, roughly speaking, is to outline them with meat.
You can make additional sketches that will reflect the thickness of the human body, the position of his palms. All folds of the bones are best marked with large dots. Namely: in the shoulders, elbows, knees, hip area. The palm can be outlined with an oval, as well as people in motion with the help of sketches, you now know.
Next, start drawing the whole body of a person. Draw the back, torso, muscles on the arms and legs, taking into account the real parameters of the human body. Draw the palm and fingers. Do not forget about small details, such as the navel, collarbone, and so on.

Draw the head
We already have an idea, you need to familiarize yourself with the information on how to depict the head. In whatever position a person is, in order for him to look natural, it is necessary to draw his details. This is a rather difficult question, because it is not at all easy to achieve a portrait likeness. However, we will try to give general recommendations.
If the head is located in profile, and not in full face, then this causes certain difficulties for a novice artist. The fact is that it is much more difficult to draw a face in profile. It is necessary to correctly draw the lines of the nose, chin, forehead. It is important to have an idea about this. This will help to correctly draw all the details of the head. In some cases, it is quite possible to depict a face schematically without drawing every line.
Coloring the drawing
A man in motion is drawn with a pencil. It remains only to add bright colors and give the picture a more animated look. Correctly choose the color with which you will paint the human skin. If you are using gouache, then dilute several colors to a flesh tone, beige tones work well. When experimenting with color selection for human skin, mix white, brown and pink. Do not dilute paints or gouache with a large amount of water, as this can warp the paper on which you painted. For painting small details, use brushes with narrow bristles. The best option for painting are brushes made from natural hairs.
All other details can be painted in any color you like. The main thing is to do it deliberately and carefully so as not to spoil the drawing.
How to draw people in motion, we figured it out. Your task is to make the most of the knowledge gained after reading this article. Develop your skills, be observant. All this will help you succeed in the art of drawing with a pencil and other means.


