Rear axle seal vaz 2107 dimensions. Installing a new seal. Determining the state of the gland
Due to the design features, replacing the gearbox oil seal rear axle on the VAZ 2107, it is required quite often. Therefore, almost every driver was faced with the need for this repair. Many beginners are afraid of such work. After all, for this, you have to remove the cardan. For an inexperienced mechanic, this is quite a challenge. But, in general, no special problems should arise. Used for work standard set tools.
Timely replacement will help you avoid further problems with this transmission element. Before carrying out work, make sure that the problem is only in the cuff.
When should it be done?
Replacing the oil seal of the rear axle gearbox on the VAZ 2107 produced in case of obvious problems with this element. Also, it is often necessary to change the oil seal when replacing the gearbox. You can diagnose the problem by the following signs:
- With increased noise from the rear axle. This is usually due to an oil leak. The oil seal should be replaced, and the required amount of transmission fluid should be filled in;
- Noise occurs during acceleration. Check the condition of the seal. If there is lubrication on the axle gearbox, then again a replacement is made.
In general, make it a habit to inspect the floor under the car for fluid leaks before every ride. This will help avoid unnecessary problems on the road.

What will be required for replacement?
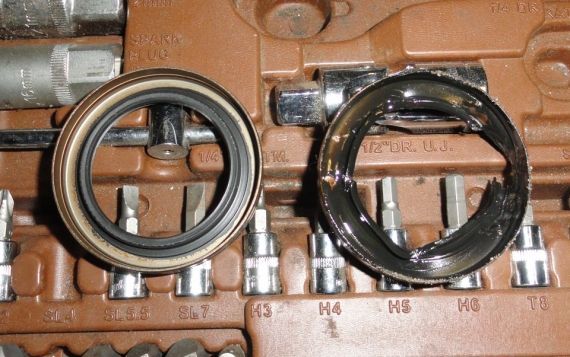
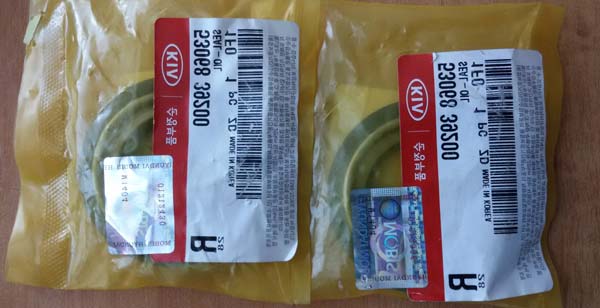
First of all, you need to purchase the gland itself. The manufacturer is not important here. Pay attention to its labeling. Also look at appearance spare parts, there should be no scratches or deformations on the plastic. The spring must be present. Sometimes rubber-metal cuffs for Niva are offered. They won't fit the Seven. From the tools you will need:
- A set of keys;
- Calipers;
- Screwdrivers;
- Montage;
- Strong cord.
Replacement
Before starting work, you need to prepare the car. Wheel chocks are installed under the front wheels. It is advisable to disconnect the battery, if available. central lock be sure to leave open window. This will avoid problems in case of accidental operation of the lock. Work is done in the following order:
- The rear axle is up. Supports must be placed under the car. Remove wheels;
- Oil drains. After that, be sure to screw the drain plug into place;
- The nuts securing the propeller shaft are unscrewed. There are 4 of them in total. When carrying out work with the help of mounting, we keep the cardan from scrolling. The shaft is removed;
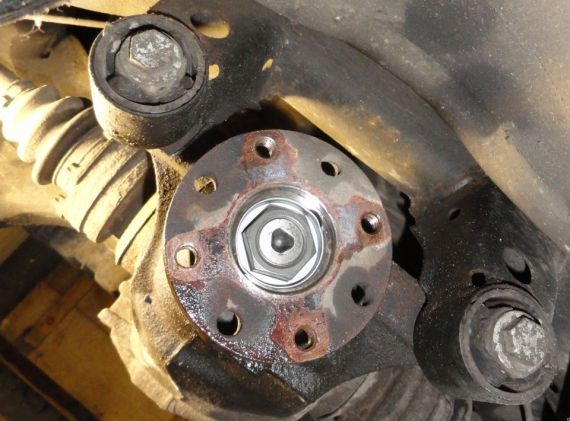
- Disconnect the flanges using a screwdriver;
- The nut securing the flange is unscrewed. In this case, it is simply necessary to keep the gearbox gear from turning;
- The flange is removed, mark its position before removal;
- Next, remove the seal. To do this, it will have to be hooked with a slotted screwdriver;
- The seat should be thoroughly cleaned from traces of corrosion;
- Lubricant is applied to the installed oil seal. Litol is best suited for this;
- The cuff is installed in the socket of the node. After that, with gentle blows of the hammer on the mandrel, the gland is put back. Avoid distortion. The depth of the front edge of the rubber-metal cuff should fluctuate 1.7-2 mm; with a large wear of the flange, it makes sense to reduce the depth of the gland. If you do not have a mandrel, then instead you can use a bearing cage of a suitable size, a pipe cut;
- We put the gear flange, as well as the washer;
- We hold the gearbox gear (take a screwdriver), tighten the flange nut. To do this, you will need a torque wrench.
- The final tightening is carried out with a force of 117-254 Hm;
- Install the driveshaft in place.
- It remains only to pour oil into the gearbox. This work is considered completed.
In many automotive components, rubber reinforced cuffs are actively used. Let's talk about their role in the distribution mechanism of the wheel drive, about the operation of reinstalling rubber products. Namely, how the oil seal is replaced in the rear axle gearbox.
It is easy to diagnose the need for such an operation. When a suspicious rumble appeared from under the bottom of the car, as well as some vibrations, it is enough to look out of the inspection hole and inspect the differential in the housing for smudges.
Typically, the cuffs of these nodes fail for the following reasons:
- the end of the average service life of the reinforced part;
- lack of oil in the assembly or its poor quality;
- large temperature fluctuations;
- constant careless driving.
Usually, a defective reinforced unit is updated - the process is available to any motorist familiar with technology. Let us consider below how the cuff of the rear axle gearbox of the VAZ and other cars is replaced.
And at the same time, we will touch on such important problems as changing the oil in the rear axle gearbox, plus reinstalling the entire differential assembly.
How to deal with VAZ
Initially, we will discuss these types of repairs with respect to the "classic" Zhiguli. Let's tell you how the oil seal of the rear axle gearbox VAZ 2107 is replaced.
We will need:
- wrenches;
- screwdriver;
- mounting blade;
- grease type "Litol";
- sandpaper;
- mandrel and hammer;
- a special key to hold the flange - a tube with two bolts inserted into the holes of the part.
Learn also about.
Begin.
- First of all, we drain the oil from the assembly unit.
- From the beam we extract the axle shafts.
- We disconnect the cardan flange from the counterpart of the tail gear with a screwdriver, having previously unscrewed the bolts. We keep the cardan from turning with a mounting blade.
- We wind a strong rope around the neck of the counter element of the drive gear, and attach hand scales to it. The force of uniform rotation of the part (kg s), multiplied by the radius of its neck gives the value of the desired moment - we write down this value.
- We unscrew the tail gear flange nut, holding the part with a special wrench.
- Remove the detached element and the washer.
- Prying with a screwdriver, we remove the reinforced rubber product.
- We clean the seat with sandpaper, lubricate with Litol.
- We press in a new spare part with a mandrel using hammer blows until a gap appears from the end of the crankcase to the part embedded inside equal to 2 mm. Now the reinstallation of the cuff of the differential assembly can be considered completed.
- We install and fasten the flange element, holding it with a special key. If the initially measured moment of resistance to rotation was at least 6 kg with x m., then the new moment should be 1 kg more with x m. In any case, we tighten until the moment of 6 kg with x m is reached, but not higher than before 12 - 26 kg with x m.
- Then we collect everything on the way in reverse.
- We pour oil.
This is how a defective oil seal is replaced with a VAZ 2107.
It should be added that the replacement of a defective part of the VAZ 2106 is carried out exactly according to the same scenario. By the way, as you can see, at the same time we changed the oil in our gearbox.
For a complete reinstallation of the entire assembly, it is necessary immediately after separating the parts according to paragraph 3 of the above instructions to unscrew the bolts fastening to the beam. Thus, the replacement of the rear axle gearbox of the “classics” is being done - VAZ 2106, 2107 and others like them.
Let's also consider replacing the leaking oil seal with a VAZ 21213 Niva. Let's take the same tools as for the "classics".
- We also drain the oil.
- After hanging the drive, remove the wheels, then the brake drums.
- Having disengaged them from the gears of the differential, we remove the axle shafts.
- We also disconnect the cardan from the counter element of the tail gear.
- Then we measure the moment.
- Everything else, including the values of the tightening torques, is observed according to the instructions for the "classics".
If you need to change a broken gearbox, say, on Niva 21214, we disconnect its body from the beam after separation from the cardan. The same can be said about replacing a defective gearbox on a Chevy Niva.
However, it must be remembered here that it is necessary to observe important rule: for both differential elements all-wheel drive must have the same gear ratio. Therefore, when replacing a broken VAZ rear axle gearbox on an all-wheel drive vehicle, it is necessary to know the gear ratio of the second unit.
At the same time, the replacement of a bad Chevrolet Niva oil seal is carried out according to the instructions already described.
What to do with Gazelle
Now consider the procedure for implementing these procedures for popular domestic trucks. Let's study the replacement of the gland at the Gazelle. For this we need:
- hammer, mandrel;
- set of wrenches;
- mounting blade;
- lubricant "Litol";
- sandpaper.
The actions are like this.
- Having propped up the front wheels, we hang out the leading part of the car.
- We disconnect the elements of the cardan and the tail gear, after unscrewing the bolts. We hold the cardan shaft or turn it for convenience with a mounting blade.
- Having unscrewed the fastening of the drive gear flange, we remove this element together with the reflector.
- Prying with a screwdriver, we take out a replaceable rubber product.
- We press in a new spare part, cleaning and lubricating the seat. We use a mandrel and a hammer.
- We do the assembly from the reverse.
The differential link device on more powerful trucks is similar. The drive gear flange also sits on the splines, so when unscrewing the nut, it does not need to be held, as was the case with the Zhiguli. 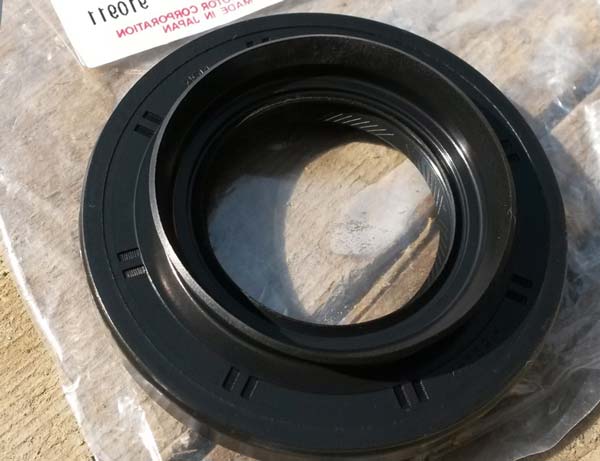
Therefore, replacing the RTI of the rear axle gearbox, say, from GAZ 66, can be done according to the instructions just given. Moreover, this instruction is even suitable for replacing a bad Mercedes 124 oil seal.
Price and a few words in conclusion
The described operation is not simple, therefore, many will be interested in its price in a car service. We have collected average data for big cities Russia. They are in the following table.
| City | Price for 1 pc. |
| Moscow | 2000 rub. |
| St. Petersburg | 1900 rub. |
| Ekaterinburg | 1000 rub. |
| Samara | 1000 rub. |
Only approximate values are given here. The actual cost of the procedure may differ slightly, but not much. It all depends on the specific service chosen, its price list.
The need to replace the oil seal is determined by reducing the oil level in the rear axle housing (due to oil leakage through the oil seal) to a level that disrupts the normal operation of the gearbox.
Fogging of the crankcase throat and even the formation of individual drops in an amount not exceeding the norm indicated below is not a sign of leakage.
Determining the state of the gland
1. Place the vehicle on a lift or pit.
2. Clean the breather from dirt, check its condition.
3. Having unscrewed the control plug, check the oil level in the axle housing; if necessary, top up the oil level.
4. Clean the neck of the gearbox housing from traces of oil and wipe dry.
5. Hang out the back bridge and put it on supports.
6. Start the engine, engage direct gear and, at a speed of 90-100 km / h, warm up the oil to a temperature of 80-90 ° C (approximately within 15 minutes).
7. With direct gear engaged, at a speed of 100 km/h, determine the amount of oil flowing out in 15 minutes.
Oil leakage exceeding 5 drops in 15 minutes is a sign of seal failure.
Replacement of a cuff of a driving gear wheel
A damaged cuff can be replaced without removing the gearbox from the vehicle. To do this, after hanging the rear axle, drain the oil from the crankcase, remove the wheels and brake drums, disengage the axle shafts from the gears of the differential (see Replacing the axle shaft and its cuffs). We disconnect the driveshaft from the drive gear flange (see Replacing the driveline) and take it aside. We determine the moment of turning the drive gear shaft, for which:
|
1. We tightly wrap a strong thread around the neck of the flange in several turns and attach a dynamometer to it. The force at which the flange begins to rotate uniformly, multiplied by the radius of the neck, will give the value of the desired moment. We write down its value. This is to ensure that the flange nut is properly tightened after assembly. |
2 |
|
|
|
|
|
6 |
 . After inserting two bolts into the holes of the flange and holding it with a mounting blade from turning, unscrew the nut with the “24” wrench
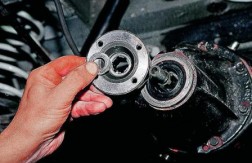 3. Remove the flange from the splines of the final drive pinion shaft.
 4. Sliding pliers remove the cuff.
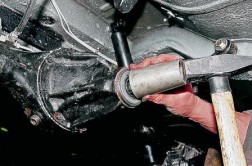 5. With light blows of a hammer through a piece of pipe of a suitable diameter, we press in a new cuff, having previously coated its seating surface with Litol-24 grease. In order not to damage the oil seal during pressing, it is necessary to press it not to the stop, but to a depth of 2 mm (permissible deviation "-0.3") between the end face of the gearbox housing and the outer surface of the oil seal.
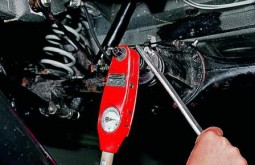 . We install a new flange nut and gradually tighten it with a torque wrench until the moment is within 12-26 kgf.m, periodically checking the force of turning the shaft with a dynamometer.
If the initial force was greater than or equal to 2.9 kgf (which corresponds to a moment of 6 kgf.cm), then tighten the nut until the flange turning force is 0.5-1.0 kgf (1-2 kgf.cm) greater than the initial . If the initial force was less than 2.9 kgf (6 kgf.cm), then we tighten the nut until a turning force of 2.9-4.3 kgf (6-9 kgf.cm) is obtained. If, when tightening the nut, the turning moment exceeded 9 kgf.cm, then we disassemble the gearbox and replace the spacer sleeve.
If you find traces of oil leakage under the flange connecting the cardan shaft and the rear axle gearbox, then you should replace the drive gear oil seal. To do this, you will need a double-sided puller for the shank flange in the gearbox and a torque wrench, which is used to control the nut tightening force. We drive the pit onto the flyover and the manhole and proceed to dismantle this spare part of the rear axle.
Removing the gland
- Put the car on the parking brake and drain all the oil from the gearbox housing of its rear axle.
- Next, apply an auxiliary mark on the gearbox and cardan flange, after which you can disconnect the shaft from the gearbox flange. The marked mark will help you to install the cardan shaft in the correct position during further assembly.
- Now take the key to "24" and unscrew the fixing nut of the gear shank. To prevent the flange from turning, tighten the two bolts and use a mounting spatula to support the flange. The double-sided puller must be installed in the correct position and the flange removed from its seat. It should be removed immediately together with the mud deflector and washer.
- Now that the flange has been removed, the gland is visible. Pry it slightly with a flathead screwdriver and pry it out of the gear axle housing.
Installing a new oil seal
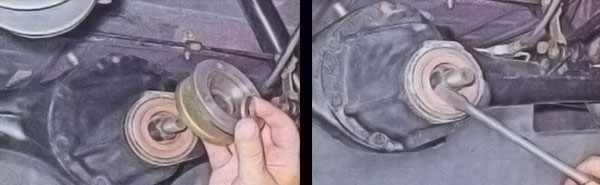
Before proceeding with the installation of a new oil seal in its original place, clean its seat from corrosion traces (if necessary). Next, lubricate the internal cavity of the crankcase and the surface of the gland itself with Litol. The gland should be pressed in with light blows of a hammer through a special mandrel of the desired diameter. Carefully control this process - there should be no distortion of the stuffing box in its seat.
Then slide the flange, deflector and washer onto the reduction shank. Fix them with a nut. The tightening of the nut should be carried out with a special torque wrench with a reading of 120 Nm. Simultaneously with this process, control the occurrence of axial play in the shank bearing. It shouldn't be. If the backlash is still present, despite the regulation of the tightening force, then it will be necessary to repair the rear axle gearbox, and in particular, replace the bearing.