The path from the rocket to the planet pencil drawing. How to draw space with a pencil step by step
God does not give everyone the ability to fine art, not all of us are artists. But it happens that a son or even a grandson suddenly asks to draw a rocket for him. And what should be answered at this moment? Especially if an adult, who should be able to do everything in the world and be an example for a kid, does not know how to draw a rocket himself. This article can help adults in this difficult matter.
Schematic representation of a rocket
The image of a starship for the youngest children can be quite sketchy. Such a pattern is perfect for decorating a plate on a locker for clothes in kindergarten, as an applique on boyish suits and t-shirts or wallpaper in the room. Even the most mediocre draftsman can figure out how to draw a rocket of this type.
Master class on drawing a rocket
Older children can be offered a more complex option. To make the starship as similar as possible to the real one, you should use the master class. It gives detailed instructions how to draw a rocket step by step.

Performing actions on the image of a given object, one should simultaneously explain to the child why the rocket needs wings, nozzles, why fire breaks out of the holes. Indeed, thanks to the fire escaping from the nozzles (jet stream), this space transport is moving. For clarity, you can even conduct an experiment with a balloon. First, it is inflated and then released, allowing the gas that has accumulated inside to escape. Let the baby see and comment on what will happen to him. hot air balloon: it will take off like a rocket (albeit for a very short time)!
Let the children's imagination fly

And after you manage to draw a rocket together, you can invite the child to complete the drawing on their own. Of course, a child's imagination will make the image different from the one offered to him by an adult. After all, the mentor teaches the kid how to draw a rocket with a pencil, and little artist be sure to approach the process creatively and paint the rocket with felt-tip pens, paints, or even depict alien stars, the sun and, possibly, even aliens nearby.
Other Ways to Depict a Rocket
- Copying a pattern from paper using glass. Of course, you first need to choose the right image. Then you need to put the drawing on the glass, covering it with a clean sheet, where the object will subsequently be located. A backlight is installed under the glass, and then the contour of the rocket is carefully outlined. You can use ordinary window glass (in case the drawing takes place during the day).
- There is also another way to draw a rocket - to translate the drawing using carbon paper. It is important here not to confuse which side fits under the sheet with the picture, otherwise there may be a risk of damage to the book or album.
- The "cell way" of drawing allows you to change the scale of the copied image. A drawn object can be enlarged or, conversely, made smaller. Cells line the original drawing and a blank sheet. Carefully examining each cell individually, on clean slate try to reproduce as accurately as possible all the lines that are in the copied pattern. It is important to explain to the baby that it does not work out quite well. author's work, because the artist simply “copies”, without using his imagination.
Some of the children dream of becoming a doctor, someone a hairdresser or a president. If your child dreams of becoming an astronaut or he is simply interested in everything related to space, then it's time to pick up colored pencils and, through creativity, immerse him in the vast space of the universe. What is space without a spaceship and a rocket? In this master class you will see how simple and easy it is to draw a rocket.
You will need: colored pencils, a thin black marker, a pencil and a piece of white paper.
How to draw a rocket - rocket body
The rocket body is drawn with 3 lines, and is close to a triangle in shape.
How to draw a rocket - "legs" of a rocket
The rocket needs support, so it's time to draw the legs. Please note that the legs are the same length.
How to Draw a Rocket - Rocket Porthole
Each rocket must have a window called a "window". It can be square or round. We will draw a round window. To do this, draw 2 circles. One circle is larger, and the second is smaller (inside the large circle).
How to draw a rocket - decorate the rocket
Our space rocket is unusual. It's time to decorate it. At this point, give your child a choice. He can create his own rocket design. In this master class, we decorated the rocket with a straight line at the bottom, with stripes on the body of the rocket and on the legs we drew semicircular lines.
How to draw a rocket - launch a rocket
In order for our rocket to fly, you need to draw a light or flash below.
How to draw a rocket - bring our drawing to life
Now it's time to decorate the rocket. Let's add colors and bring our drawing to life. Try not to go beyond the boundaries of the picture.
How to draw a rocket - outline the drawing
Take a black marker and trace the drawing. This step can be skipped and left without a stroke.
How to draw a rocket - adding special effects
In order for the rocket to fly visually on paper, add lines around the drawing. So it will be seen that the rocket is directed to the sky and is ready to conquer space.
How to draw a rocket - we continue to fantasize
A rocket will be bored on a white sheet of paper without the sky and planets. Develop the space theme. Let the child dream up and try to draw planets, the sky or an astronaut.
It's quite easy to draw. Through simple master classes You will help your child develop imagination and logic. Drawing a rocket is now not a big deal for you. With simple movements pencil, a white sheet of paper can turn into a cosmic universe.


Rockets fly into space, while burning a huge amount of fuel and help people to visit or at least see places where no man has gone before.
In this lesson we will figure out how to draw a rocket for children aged 6 years and older. Despite the fact that the lesson is designed for children, adults can also draw such drawings, because they turn out to be very beautiful.
First drawing method
The first method is very simple, even the most Small child, nevertheless, the drawing is very beautiful.
1 step
We draw the body in the form of a bullet, then we divide it into two stripes and paint on the porthole in the center. It is best to draw with a pencil. 
2 step
Adding guide wings to our rocket. 
3 step
We color with colored pencils or something else and our drawing is ready!
Also, you can experiment with colors, shapes and sizes of the picture, eventually getting an alien ship :)
The second way to draw
The second example is a little more complicated, since it is drawn in volume. A child of eight years old can easily cope with this example of drawing.
Stage 1
We draw an oval with a pencil and two stripes from it to get something that looks like a pipe. 
Stage 2
We make a triangular nose of the rocket and as in the previous step, draw three circles and lines from them. Only now the ovals should be a little smaller. 
Stage 3
We erase the auxiliary lines, add a porthole in the middle and divide the rocket into two strips above and below. 
Stage 4
We have finished drawing and now it's time to color our drawing. Also, you can add planets and stars :)
If you draw a lot of spaceships and Mars, then you get a picture of the future, a picture of the colonization of Mars!
The third way to draw
The two previous examples were quite simple, and now we have a detailed rocket in volume. A small child may not be able to cope with this example, but it’s still worth trying! Older children, of course, will be able to draw such a rocket.
Stage 1
We outline the silhouette with a pencil. You need to try to make it symmetrical. Also, for convenience, you need to divide the silhouette in half, so it will be easier to draw the next steps.

Stage 2
We paint on two portholes and divide the body with horizontal and vertical lines.

Stage 3
We draw flames and stripes on the wings of the rocket.

The drawing is ready, it remains only to color it with colored pencils!
Also, next to it you can draw a small man with a pencil. The result will be a drawing with an astronaut going into outer space directly from a rocket.
We hope that you liked our drawing article and that your child was satisfied with the drawing.
Well .. While my movie is loading, I'm doing a lesson in drawing space .. It might come in handy.
How to draw space with a pencil step by step
Step one.
We draw a round shape for the planet and the outlines of the landscape.
Step two.
Let's correct the contours of the planet and its satellite. On foreground draw two men, these are astronauts sent to the moon.

Step three.
Let's add strokes.

Step four.
Let's draw a starry sky. Or, to be more precise, it is open space. in the middle lunar landscape draw some craters.

Step five.
And it remains to add some shadows. In the end it turned out like this space picture:

How to draw the Earth with a pencil step by step
Step one. Drawing a circle by hand is very difficult. First we need two squares, divided in half, in order to fit the colo into them. Of course, you can take a compass and draw a kolo. But this is not the king's business.  Step two. As mentioned above, we make the outline of our planet, draw four arcs at the corners of the square.
  Step three. Now it will be easier to draw even circle. We combine the arcs so that everything turns out as clear as possible.
  Step four. Now we sketch on our ball all the continents, oceans, islands and peninsulas. Anything that will fit and be noticeable.
  Step five. We remove the auxiliary lines. We stumble around the planet with dots - an image of distant stars, move with a pencil, depict the cosmos so that the planet does not look lonely.
How to draw the planets of the solar system with a pencil
Step one
Draw the orbits of the planets. Their shape is an ellipse close to a circle. But, if you look from one point, then visually we see not circles, but arcs, parts of ellipses. Such as in the picture. On the lines we outline the positions of the planets.

step two
We draw circles - planets. We start with small Mercury, then Venus and the Earth are larger, again a small circle is Mars and further, as in the figure. In the lower left corner we show the edge of the Sun.

Step Three
Erase the auxiliary lines - the axes of the circles. Let's make the orbits brighter.

Step Four
Let's add others celestial bodies: comets, asteroids. Let's draw "rings" to the major planets.

Step five
Let's do the shading. With it, we must turn our circles into a sphere. Remember that we have the Sun in the center, and light falls from its side. But the opposite side of the planet will be darkened. The result should be something like this:

How to draw an astronaut with a pencil step by step
There are four steps ahead.
Step one.
In the upper part of the sheet we place a round large head. She's big because she's wearing a helmet. Draw two curved lines down - this is the contour of the body. We will draw an astronaut in zero gravity. And this immediately sets his position. Let's draw the contours of the arms and legs. There is a belt on the suit. Let's outline a backpack behind our shoulders.

Step two.
We begin to draw the details: a helmet, fingers, all sorts of bells and whistles on the "suit". And all the elements are quite large.

Step three.
Draw an opening for the eyes on the helmet, make it voluminous. Let's start drawing shoes. Let's show the pocket-bag on the belt. Look carefully at the picture and fill in the missing on your sheet. Rivets, folds on the fingers and more.

Step four.
On the belts we will show horizontal shading. Let's draw the shoes: a pattern on the sole, a clasp. On the hip of the astronaut is a small electronic device. Now let's outline the main elements of our drawing. Almost done. You can “revive” our hero with the help of hatching, or give color with the help of paints!

How to draw a space rocket with a pencil step by step
Step one. Our rocket is not just some kind of apparatus with an engine, but a whole spaceship. We draw two oval figures - this is the hull of the ship. At the bottom, we will notice one wing of the rocket, and behind - the tail.  Step two. We connect the ovals. The structure of the rocket, its structural parts have a complex shape, which does not make sense to describe. Therefore, try to repeat as you see in the picture, or you can come up with your own rocket.
  Step three. The ship should have many different parts on the hull, plates, guns, portholes.
  Step four.
  Step five.
How to draw a moon rover with a pencil step by step
Step one. We divide the device into structural parts, depicting them on paper in the form of rectangles.  Step two. Let's sketch a sketch of an astronaut sitting in a car.
  Step three. Add a small antenna in front of the machine, outline the person behind the wheel in more detail.
  Step four. Let's remove the auxiliary lines and outline the contours more clearly.
  Step five. To show the effect of movement, we will make shadows under it, and add hatching to the wheels, the astronaut and other parts. Here:
How to draw a spaceship with a pencil step by step
Step one. Draw the pattern with geometric shapes for the ship, we will display the hull and places for the engines. 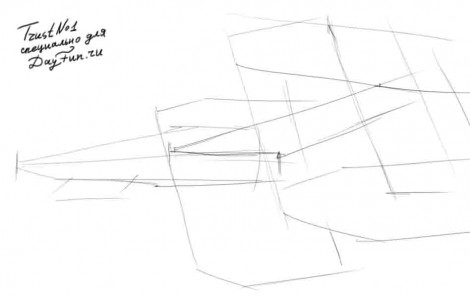 Step two. Let's draw jet turbines, tweak the lines of the hull a little and add a small cannon under it.
  Step three. You need to highlight the borders with a thicker line with a pencil, add a lot of details to the wing, circle them, and also add the number 09 for the look.
  Step four. Light movements shade the entire area of the ship horizontally, and shade the windows, turbine outlets and cannon completely.
How to draw the moon with a pencil step by step
Step one. We denote the location of the moon on paper with a square.  Step two. Let's draw a circle, preferably even. Although the surface of the moon is not flat, it will look different from a distance.
  Step three. Let's add craters, mountains and hollows on the surface.
  Step four. Let's add hatching.
In fact, such a complex structure as a rocket is very easy to draw if you use special lessons and guides. Of course, this is only true if you decide to draw a rocket in cartoon style rather than a realistic model. Perhaps, if you are just learning to draw, then it is better to start with something simpler.
So, let's start drawing a rocket. First of all, we need to depict its base - a figure that resembles a bullet or a carrot in shape. Try to keep the edges smooth and the curves smooth and neat. Don't put too much pressure on the pencil, otherwise your drawing is unlikely to look neat.
Separate the upper part of the base of our rocket with two curved lines that are a short distance from each other. The ends of these lines should reach the edges of the rocket.

In the lower part of the rocket body, let's draw the side elements of our design.


You can decorate the body with some simple pattern– for example, here we have added a square with two parallel lines in the middle.

Color the resulting drawing with the colors that you like, and draw around the starry sky, or, for example, the moon either.

You can draw a rocket with your child for absolutely any reason - for example, just for fun or as a gift - a postcard with the image of a spaceship will perfectly complement some cute gift in the form of a nice souvenir from the "House of Figurines". Dad, grandfather or older brother who received a card for February 23 will definitely be glad that the child reveals his creative potential and tries to create something beautiful and attractive.
If the first time it doesn’t work out, this is not a reason to get upset and give up. Try again after carefully reading all the descriptions for step by step pictures lesson. It might be worth looking into more simple lessons which will definitely be within the power of the baby.


