How to replace the valve cover gasket? Detailed guide from the masters of service stations. Valve cover gasket: change or not
The valve cover of the engine is the first element that the eye falls on when opening the car hood. Many motorists like to paint the valve cover along with the air cleaner body in contrasting bright colors, thus emphasizing the individuality of the engine compartment of their car. The purpose of the valve cover is obvious and quite simple - it protects the gas distribution mechanism and is equipped with a neck for filling engine oil. The cover is attached to the valve head with several bolts or nuts, and a gasket must be present under the cover.
Sometimes it happens that, it would seem, such a durable element located on the surface needs to be replaced. Sometimes due to the fact that the tightening torques of the bolts were not observed correctly, or the cover led due to exposure to high temperatures on low-quality materials from which it was made. Of course, there can be no talk of any tightness, and the cover urgently needs to be changed.
Purpose of the valve cover
To determine the purpose of the valve block cover, it is necessary to clearly understand its location in the engine. Logically and starting from the name, this element is located close to the motor valves, which are designed to take in and let air into the combustion chamber and exhaust gases from it. The camshaft, which is a steel axle with cams mounted on it, is responsible for ensuring that the valves open in a timely manner. The camshaft is driven power unit. At the moments of its rotation, the camshaft acts on the valves with cams, opening them. This whole mechanism is called gas distribution, and it is closed by a valve cover.
In order for all rotating mechanisms to be in the process of uninterrupted stable operation, they are lubricated with engine oil. On early models of cars, the valve cover as an element of the engine did not exist. What happened? The entire engine bay was covered in splatter. engine oil. Lubricant wasted excessively. But an even bigger problem with the lack of a valve cover was that dust could get into the system, subsequently contaminating this precise mechanism. Reliability was at a very low level.
 Summing up, we can say that The valve cover performs two important functions: prevents dust and dirt from entering the valve mechanism of the power unit, and also prevents engine oil from escaping. Therefore, the valve cover helps keep the engine clean, both inside and out. A well-maintained car is a significant factor in determining the good reputation of its owner.
What does it take to replace a valve cover?
Having acquired a set of simple tools and a desire to service your car, you can carry out the procedure very quickly. self replacement engine valve cover. Of the consumables you will need:
- new valve cover;
Good high temperature sealant for the engine;
Degreaser or thinner: gasoline, anti-silicone or other;
torque wrench.
Valve cover replacement features
The valve cover is very easy to replace. To do this, remove the air-cleaning housing and unscrew the mounting bolts around the perimeter. If there are additional devices (any attachments) on the cover, they should also be dismantled. Check the gasket: if it is also damaged during the operation of the engine, then it will have to be replaced. The place of contact between the main cylinder block and the cover should be cleaned of old sealant and degreased. Lubricate the gasket on both sides (if you change it too), put it in place and cover with a new cover. Reassemble in exactly the reverse order.
 You should never order car parts just by asking on the Internet. Always ask questions and look for other sources. Compare and weigh the pros and cons before placing an order. The best option would be to contact the store and consult with the seller. Then you protect yourself from liability for the wrong choice of valve cover, which will fall on the employee of the auto shop. His direct responsibilities include selection using the vehicle identification number (VIN).
Common mistakes when replacing a valve cover
It would seem, at first glance, a simple procedure for replacing the valve cover for some motorists still causes difficulties. After installing a new cover, oil may begin to flow, which was not there before. Errors may vary. The most common of them are the following:
1. Using a low-quality cover or not quite a suitable model;
2. Improper application of sealant or use of one that has expired;
3. Warping of the cover itself as a result of uneven tightening of nuts or bolts.
Before repairing your car, be sure to study the valve cover tightening diagram in the manual for it. Just act on it. At the same time, control the tightening force with a torque wrench.
Subscribe to our feeds
The valve cover on the VAZ 2106 has to be removed in many cases, from the procedure for tensioning the timing chain, adjusting the valves and ending with disassembling the engine. It is not difficult to remove and can be done in 10 minutes if available. the right tool, a complete list of which is given below:
- Heads for 8 and 10
- Extension
- Ratchet or collar
- Pliers
Before proceeding with this repair, you will need to perform some procedures to free access to remove the valve cover. Namely, the first step is to remove the air filter housing, as it will interfere with us.
To do this, unscrew the three nuts securing the filter cover and remove it, and then remove the filter:
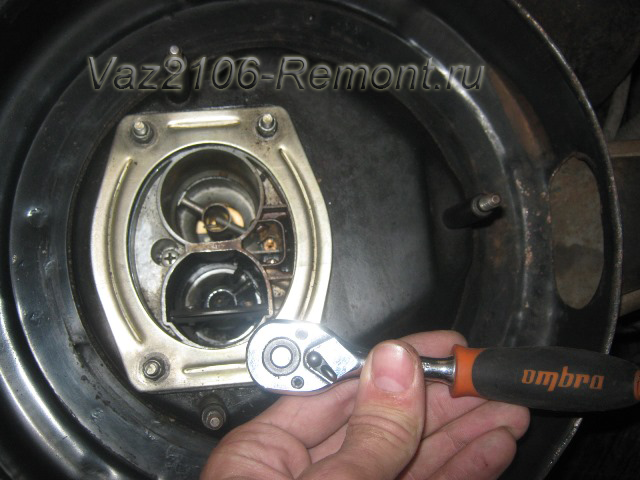
Then we unscrew 4 nuts securing the body to the carburetor:
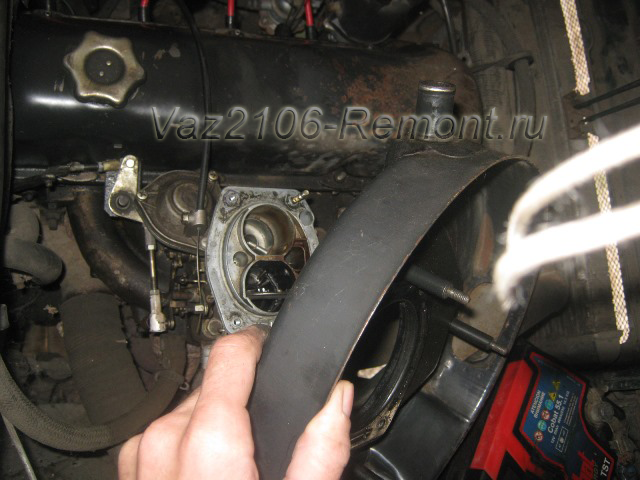
And remove the housing, after disconnecting the hose from the air intake breather:
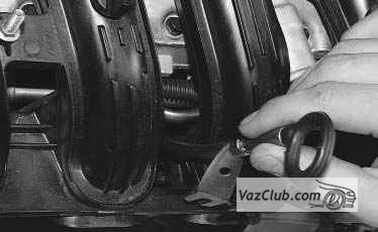
Now you need to disconnect the carburetor damper drive rod by lifting it up and moving it to the side. If you have a retaining ring, then you must first remove it:
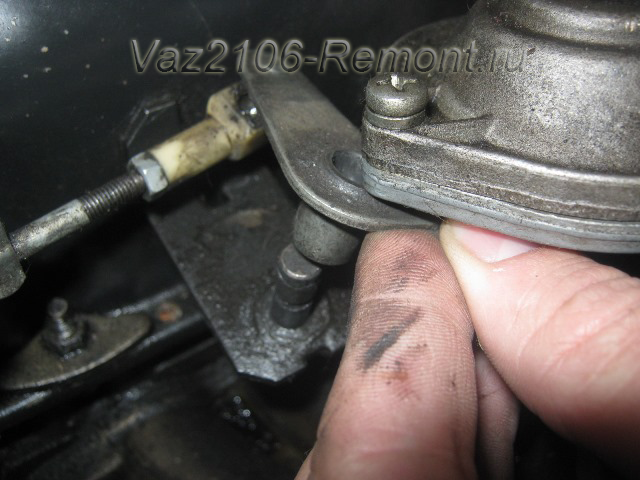
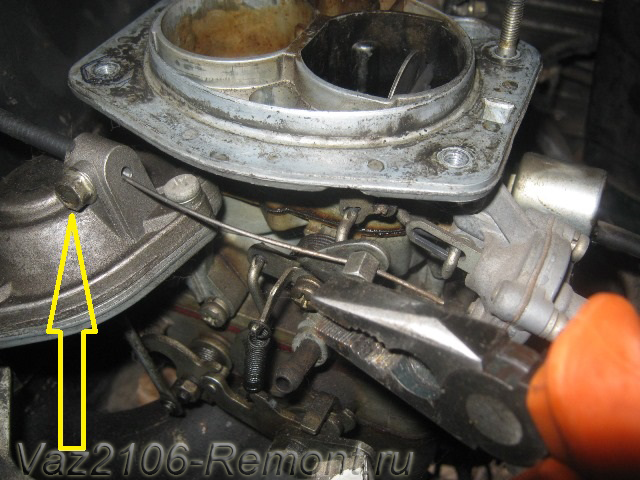
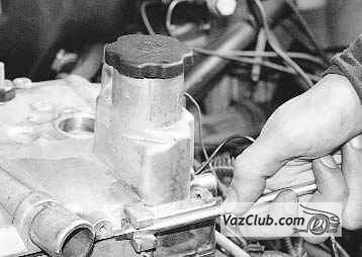
It is also worth immediately disconnecting the suction cable. To do this, first loosen the nut with an 8 wrench, which is shown by the arrow in the photo below, and slightly release the cable clamp (bolt) with pliers:
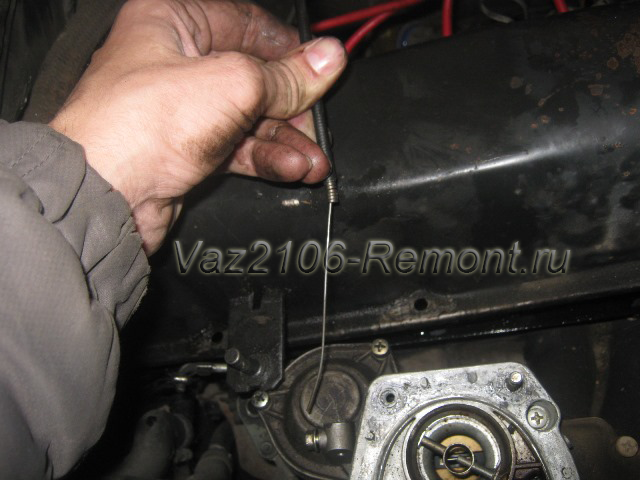
Then we take out the suction cable, since it is free and no longer fastens with anything:
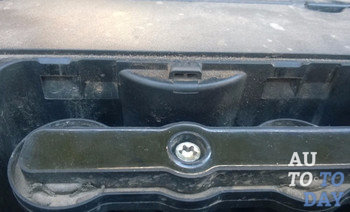
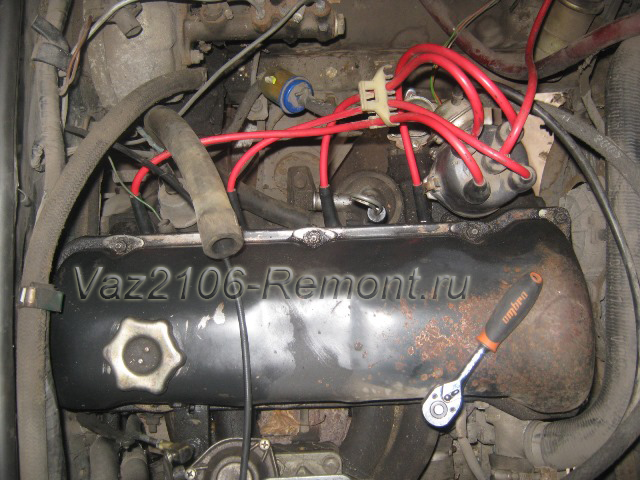
After that, you can begin to unscrew the eight nuts securing the VAZ 2106 valve cover. The most convenient way to do this is with a ratchet with a long extension and a 10 head.
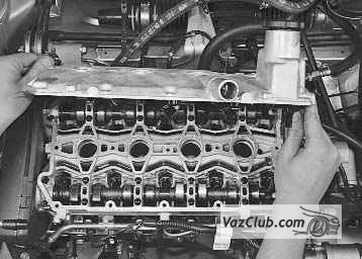
When all the nuts are unscrewed, we try to lift the valve cover and remove it from the studs. Finally, it is taken out at a certain angle, you will have to turn and tilt a little on different sides so that it does not cling to anything and comes out freely.
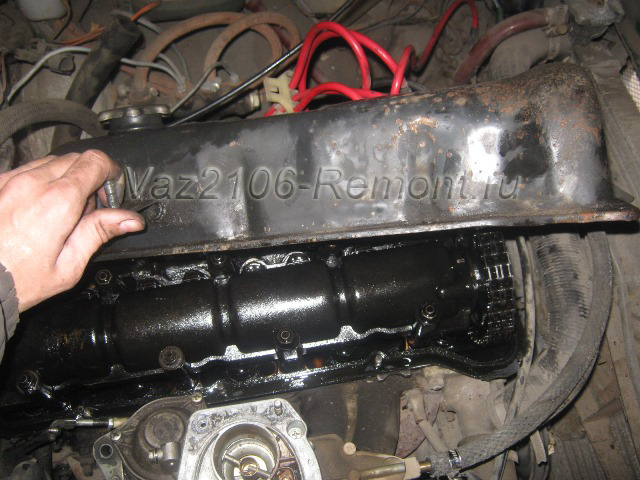
After the valve cover is removed, it is possible to carry out the necessary procedures, for which it was removed. If the gasket needs to be replaced, it is also easy to change. Remove the old gasket, carefully wipe the seat on the cylinder head and put the new gasket on the studs. It is also advisable to wipe the cover very well before installation so that it is dry.
We install in the reverse order of removal. Do not forget to put back the cable and carburetor rod, as well as put on all the disconnected hoses.
Repair of the cylinder head, the procedure for installing and assembling the engine head Lada 2170, the stages of removing and disassembling the cylinder head of the Lada 2171 car, replacing the timing belt Lada Priora. Replacing the head cover gasket The device of the cylinder head Lada Priora, Lada Priora, do-it-yourself repairReplacing the head cover gasket photo, Lada Priora cylinder head device
Maintenance of the power supply system, cooling, lubrication, exhaust gases of the VAZ 2170 Priora engine, engine repair manual, cylinder heads VAZ 2172 Priora. Modifications of the engine vaz 2171 prior.Removal and installation of the cylinder head cover gasket Lada Priora (Lada Priora), VAZ 2170, VAZ 2171, VAZ 2172
In the VAZ 21126 engine, the joint between the cover and the cylinder head of the VAZ 2170 is sealed with a sealant applied to the mating surfaces of the parts.
If the oil leak from under the cylinder head cover could not be eliminated by tightening the cover fastening nuts, replace the sealing layer of the sealant.
You will need: socket wrench “8”, wrenches “10”, “13”, screwdrivers with a flat and cross-shaped blade, wire cutters or a knife.
1. Disconnect the ignition coil harness pads ...
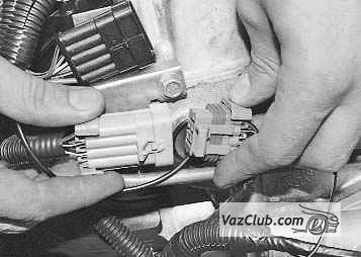
2. ... and injector wiring harness.

3. Squeezing the latches with your fingers, disconnect the block of the wiring harness for the ignition coils of the VAZ 2171 ...

4. ... and the block of the wiring harness for the injectors of the prior car from the front bracket.
5. Unscrew the fastening bolts with a “10” wrench and remove the front ...
6. ...and rear brackets.
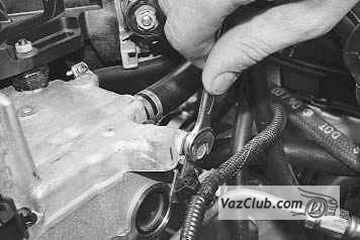
7. Loosen clamp...
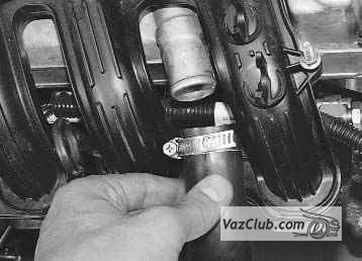
8. ... and remove the exhaust hose of the Lada Priora crankcase ventilation system from the branch pipe of the head cover.
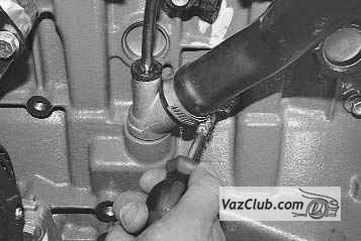
9. Loosen clamp...
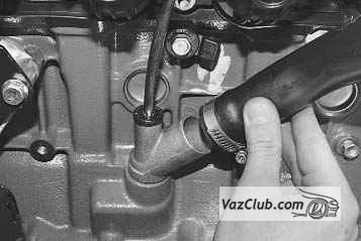
10. ... and remove the exhaust hose of the crankcase ventilation system from the branch pipe of the Lada Priora cylinder block.
![]()
11. Remove the screw securing the bracket for the oil level indicator (dipstick) guide ...
12. ... and remove the guide along with the pointer.
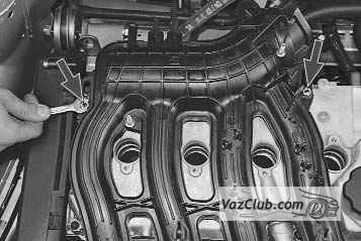
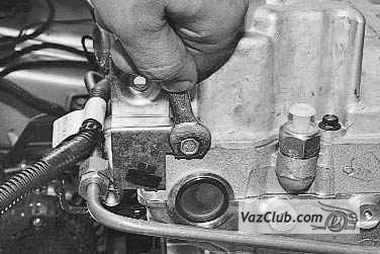
13. Turn off with a key "on 10" two nuts of fastening of an inlet collector to a cover of a head of the block.

14. Using the “13” wrench, unscrew the three nuts and unscrew the two bolts securing the VAZ 2170 intake manifold to the block head ...
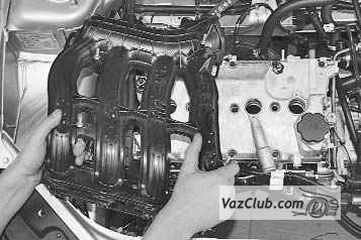
15. ... and remove the Lada Priora intake manifold.
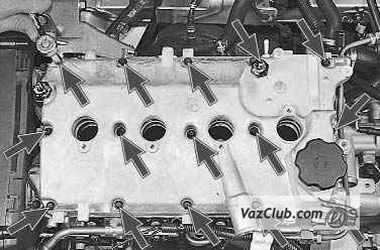
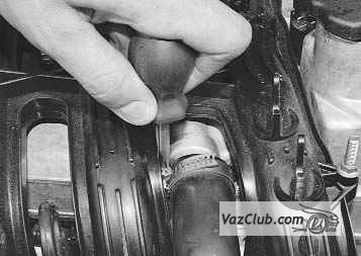
16. Turn out with a socket wrench “8” fifteen bolts securing the cover of the cylinder head of the VAZ 2172 ...
17. ... press the cover from the cylinder head of the VAZ 2172 by the protrusions located along its perimeter ...
18. ... and remove the cover.
Note
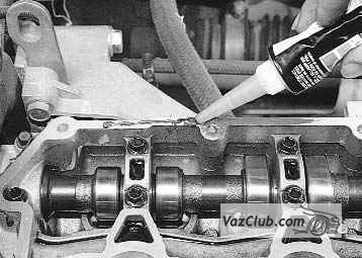
Before installing the cover, clean the mating surfaces of the head of the block and the cover of the VAZ 2171 from the old sealant, degrease them. Apply a thin layer of sealant to the mating surface of the cylinder head.
19. Install parts in reverse order.
|
Camshafts Removal and installation of camshafts Lada Priora (Lada Priora) |
|
Replacement of valve lifters Removal and installation of valve lifters Lada Priora (Lada Priora) |
|
Malfunctions of valve lifters Malfunctions of valve lifters Lada Priora (Lada Priora) their causes and solutions |
|
Dismantling and assembly of a head of cylinders Assembly and disassembly of the cylinder head Lada Priora (Lada Priora) |
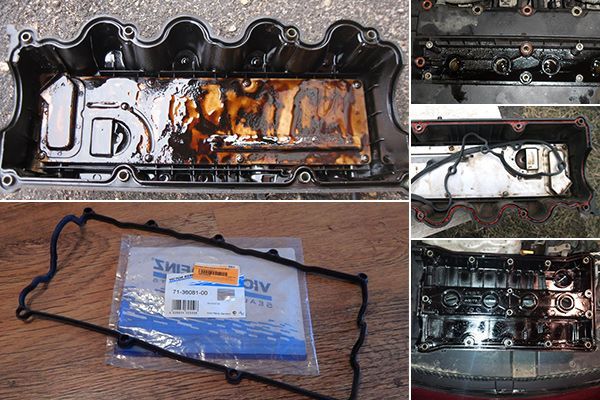
Oil leakage from under the valve cover is a fairly common failure in many engine models. In most cases, the valve cover gasket needs to be replaced. The procedure is simple, but there are a few nuances that should be studied before starting the repair.
When to change?
The frequency of replacement depends on the specific car model and on the mode of operation. Chevrolet Lacetti, for example, has a chronic illness. The factory valve cover gasket can withstand from 40 to 100 thousand kilometers, but after the first replacement, this assembly will have to be repaired more often. For many car owners, this becomes a forced annual ritual.
On some engines, the valve cover gasket can leak quite a bit of oil ("sweat"), this can go on for years. It is better not to touch this option. If the leak has become noticeable (streaks on the engine, oil stains under the car), then do not delay the replacement.
One hundred percent sign of the need to replace the gasket is when the oil begins to completely fill the candle wells, which leads to unstable engine operation. You can, of course, soak the oil with a rag, but you will quickly get tired of such a procedure, and this is not at all useful for the operation of the motor.
In cases where the engine or gas distribution mechanism has been repaired, the valve cover gasket must be replaced. Even if the old one didn't leak. 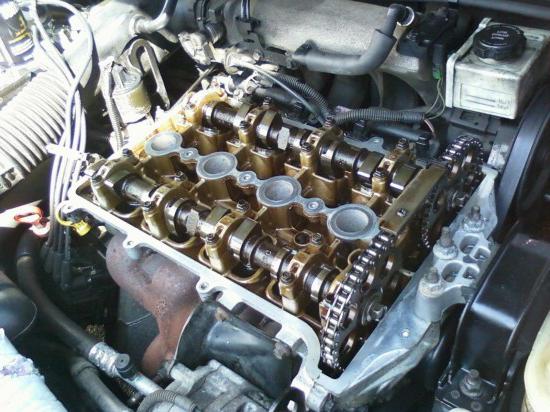
Can I change myself?
If desired, each driver can handle the replacement procedure. The valve cover gasket is pretty easy to remove. It is enough to disconnect all the pipes that fit the cover. Then unscrew all fixing screws. This will give you access to the gasket, which must be removed and discarded. Before starting work, it is recommended to disconnect the negative terminal of the battery in order to avoid accidental short circuits.
The reverse order is a little more difficult. It is necessary to thoroughly clean the "seat" place from the old sealant and dirt. The cover also needs to be cleaned and degreased (at the points of contact with the gasket). Now you can install a new spare part. To ensure that the valve cover gasket is not damaged during assembly, you will need information on the correct tightening pattern. The quickest way to find out is in the user manual.
Important is the tightening torque, which must be adjusted with a torque wrench. But since such a tool is not always possible to find, many trust their own feelings. Most importantly, without fanaticism. 
Possible Complications
If the problem of oil leakage remains after replacing the gasket, then there may be several reasons. The most common is the use of low-quality gaskets. good pads made from a special composition that is resistant to temperature extremes and the effects of oil and gasoline. The VAZ valve cover gasket is inexpensive, but for foreign cars the situation is completely different. Therefore, many car owners purchase gaskets of dubious origin in an attempt to save money. More often than not, this has the opposite effect. As a result, you have to repeat the repair procedure and buy a better spare part.
Sometimes replacing the gasket does not help due to deformation of the valve cover. Its replacement will cost much more. Although the procedure and order of repair do not differ. On some engine models (for example, 1.8 and 2.0 liters for Peugeot 407), the gasket is not supplied separately. It comes assembled with a valve cover and only in the original, which is quite expensive (using a variety of sealants does not help). This feature is useful to know before buying.
One of the most basic mistakes when replacing a gasket is neglecting the diagram and the tightening torque of the bolts. In this case, distortion occurs, which leads to leakage and deformation of the valve cover. 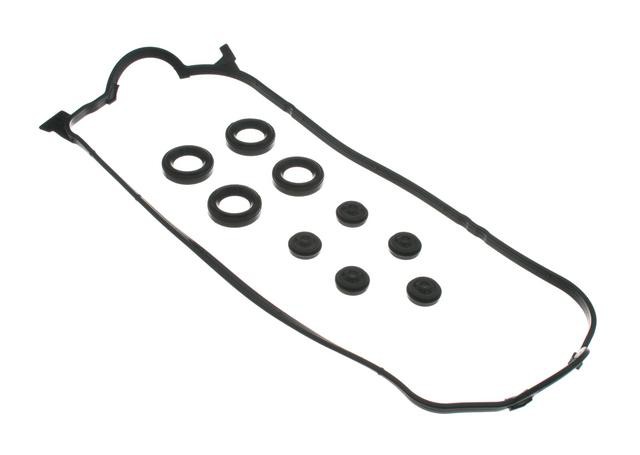
Outcome
It is not difficult to make a replacement, but before starting work, it is worth arming yourself with knowledge and a torque wrench. The main points that you need to know: the degree and pattern of tightening, whether it is necessary to use a sealant (and what type), whether additional rubber rings are needed for the bolts. The first time there may be hitches, but the second procedure will take no more than an hour. Happy repair!
Any owner of a personal vehicle will have to figure out in detail how to replace the valve cover gasket if he notices that the engine is not lubricated with oil, as it should be - from the inside, but also from the outside. Especially if the candle well is also, to put it mildly, not dry.
Such signs indicate that the gasket has dried up and / or cracked, as a result of which oil began to leak into the engine compartment. In principle, on many domestic brands of cars, especially old ones, there is a similar disease.
For a classic VAZ engine, in general, it is considered an anomalous phenomenon if at least somewhere, at least something, at least somewhere does not leak! If you have a certain money supply with this problem, you can drive up to the service station. It is quite possible for thrifty and active, inquisitive motorists to cope with the replacement on their own.
How to replace the valve cover gasket, it is easy to understand, as well as to cope with the process itself. For ease of perception, we divide all actions into stages.
Ensuring access
It’s just that you can’t get to the cover gasket, you will have to make some preliminary manipulations. First, pliers must be moved from air valves clamps, then remove them from the cover. The next step is to loosen the clamp and then remove the oil hose. Next, the camshaft sensor wiring is removed from the cover, the wiring from the ignition is removed from the candles and the cover is removed.
Next, the next clamp is loosened - on the air filter - and 2 bolts are unscrewed, which fix the filter housing. After removing it, you can proceed to dismantle the valve cover itself. It is fastened with 12 bolts, they must be unscrewed and set aside.
Bolts can be welded to threads; in this case, you will have to act carefully so as not to rip them off. You can even drop oils to make it easier to go or, if there is -. When the bolts are out, the cover lifts up easily.

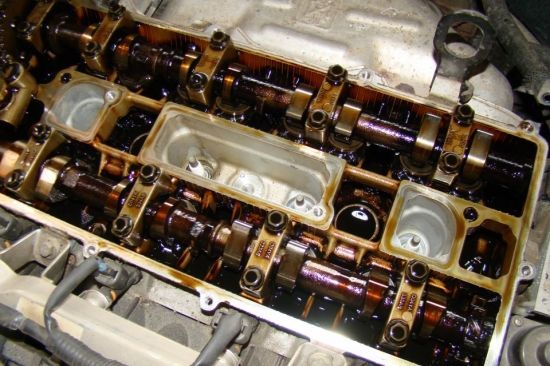
Removing the old gasket: Since there was a need for a change, it means that the “insides” are already in oil. It must be wiped as you remove the old gasket. Moreover, it is necessary to remove streaks not only from the gasket bed, but also from candle wells, and from the cover - from everywhere where the oil has managed to flow. The gasket is usually removed without difficulty; if she had time to "take a boil", she is hooked with a screwdriver. The main thing is not to make sudden gestures, so as not to tear the “elastic band” once again and not leave scraps under the hood.
Installing a new gasket
Before laying the whole “elastic band”, you need to carefully make sure that small pieces have not dried from the old one to the bed. They will not give the desired tightness; and if they have hardened, they can tear a new gasket.
It is desirable to clean bed with a metal brush, even if nothing is visually detected (increased vigilance is never superfluous). You need to check the lid itself: it is likely that sticking exists around its perimeter. Then the installation site is washed and wiped dry. Similar actions are performed with the valve cover.
The "elastic band" is laid out evenly and without distortion on the bed. The cover is put in place; it is checked whether the gasket has not twisted, the gasket has not come out. If everything is in order, the lid is lightly pressed by hand so that from the very beginning, before fixing, there are no distortions. Now it's a matter of tightening the bolts.
If the instructions do not specify certain order, the bolts come back into place diagonally so that the attraction is uniform and does not pinch the gasket. When screwing the bolts in turn, moving along the perimeter of the cover, skew is almost guaranteed.
"Put" the cover on the sealant? It's up to the owner of the car. In the factory assembly, such actions are not provided. In new machines, this step may also be superfluous. However, if your car is well-worn, the geometry of the cover and the object covered by it may no longer match. Many masters advise not to neglect sealant.
If you decide to heed such recommendations, then it is supposed to be applied to a cleaned, washed and dried bed before placing the gasket. The “gum” itself will have to be laid out especially carefully, meticulously fitting it closer inward: after that you can’t fix it. Particularly vigilant reinsurers apply a layer of sealant on top of the gasket, but in most cases this is still probably superfluous.
If you intend to use a sealant, it is worth considering that only non-silicone brands are taken on the valve cover. This is due to the fact that silicone has an extremely negative effect.


