How to place a customer order with a reservation of goods from the current balance in the warehouse after the customer has paid in advance? Managing customer orders Separating goods to order.
To complete this operation, use the Customer Order document.
To complete this operation, the Customer Orders checkbox must be enabled in the program settings (section Administration - CRM and Sales). To complete this operation, you can use the work options Order from warehouse and Order from warehouse and to order. The method uses the Order from warehouse and to order operating mode.
A new document can be entered from the list of Customer Orders documents (Sales section) or created based on a transaction with a customer, a commercial proposal, or an assignment to a sales representative. The procedure for entering and filling out fields in these cases is described in the relevant sections of the reference book. In this section we will consider the option when a customer order is entered from a list of documents.
It should be noted that the procedure for working with a customer order depends on the conditions that are determined by the agreement with the customer and does not depend on exactly how the new customer order was created.
When you enter a new document after selecting information about a partner, the details that we have established in the agreement for this partner are automatically installed.
In previous sections of the reference book, we have already considered the issue of how to formalize an agreement with a client, how to enter information about prices and discounts that will apply within the framework of this agreement.
Entering a new client into the order form can begin by entering information about the partner (Client) or information about the legal entity of the partner (Counterparty). You can use the Quick Entry mode to enter customer information.
For example, if we know information about the client’s TIN, then information about the first digits of the TIN can be entered in the Client or Counterparty field and press the Enter button. If the program can uniquely identify this information, it will automatically fill in the information about the counterparty. If unambiguous identification has not occurred, a list of values will be offered (as shown in the figure) from which you need to select the one you need.
In a similar way, you can fill in the first letters of the name of the partner (client).
After entering customer information, all available information is automatically filled in if it can be uniquely identified:
- if one legal entity is defined for the client, then after entering information about the client, information about the counterparty will be automatically filled in;
- if the client always works under the same conditions, that is, an individual or a very specific standard agreement applies to him, then information about this agreement will be automatically filled in in the document;
- if, according to the terms of the agreement, settlements must be carried out according to agreements and one agreement is defined for the legal entity of the partner (counterparty), then information about this agreement will be automatically filled in in the document.
If the client has a choice - the client can work under several agreements or on behalf of several legal entities, then this information must be additionally filled out in the document, indicating the necessary data in the appropriate fields of the document.
When entering a new document, the program automatically fills in information about the organization and warehouse in accordance with the statistics of indicating this information in previous documents of this type, if this information is not specified in the agreement. That is, if a manager places orders on behalf of one organization for one warehouse, then when entering subsequent documents (when entering a third document), this information will be filled in automatically.

So, the Simon & Schuster partner was chosen as the client who ordered the goods from us. The Wholesale sales (prepayment) agreement is selected as the agreement with the client. When drawing up a document, the parameters set in this agreement will be used.
To view the parameters set in the agreement, you need to click the button next to the agreement name.

According to the conditions of the example, the goods should be reserved according to the customer's order only after full payment by the buyer. Therefore, in the agreement with the client, the Prepayment payment schedule was selected, which specifies a 100% advance payment with a deferred payment of 5 days. In accordance with this parameter, the payment date (hyperlink To payment) in the document will be automatically calculated. We will fill in the payment date later, after we have decided on the order amount (list of ordered items).
Note
The payment date can be calculated according to calendar or business days. This is determined by checking the box in the payment schedule. In our case, we use Accounting for deferment by calendar days. Therefore, the payment date will be calculated taking into account weekends.
By default, the wholesale price is set for this client (Price type – wholesale). Information about this price will be used when filling out prices for goods in the document.
The agreement with the client sets the currency - rubles (RUB). This currency is set by default in the customer order. A customer order can be placed in any currency registered in the Currency directory. Information about the currency is filled in on the Additional page.

The currency specified in the customer's order will be the currency in which mutual settlements with the partner are carried out. The settlement currency specified in the order is strictly linked to the settlement currency under the agreement. If mutual settlements with the client are carried out according to agreements, then only the agreement whose currency coincides with the order currency can be specified as an agreement in the customer’s order.
Within the framework of one agreement, orders can be placed with mutual settlements in different currencies and under different agreements. In accordance with the conditions specified in the agreement, indication of the contract is not required, therefore information about the contract will not be indicated in the document.
It should be remembered that if the customer's order is placed in a currency different from the agreement currency, this will be a violation of the terms of sale. Only the manager for whom the right to deviate from the sales conditions is enabled will be able to place such an order, or for this order it will be necessary to carry out additional approval of deviations from the sales conditions.
In our example, we will place the customer’s order in the currency specified in the agreement, in rubles. In accordance with the terms of the agreement, the document was automatically filled in with information about the organization “Trading House “Complex”, on whose behalf the client’s order will be processed.
Information about the warehouse where the goods will be reserved was filled out in the customer order in accordance with previously completed documents (according to usage statistics). We will consider the option when goods are reserved and shipped from one warehouse. According to statistics, the Central Warehouse has filled up. Let's change the warehouse and indicate the "Household Appliances" warehouse. It should be recalled that warehouses in edition 11 of the “Trade Management” configuration are storage areas that can be divided into several premises. The actual shipment of goods can subsequently be made from different premises of the same warehouse territory. At the same time, it is possible to specify in one order a group that will include several warehouse territories.
In the "Household Appliances" warehouse, the balance of goods is controlled, taking into account previously reserved goods (the Control collateral checkbox is selected).

After determining the main parameters of the order, we proceed to the selection of goods in the tabular part of the document. When selecting products, you can use the quick selection option by the first letters of the short name or by product article number.

With this selection option, wholesale prices for the product will be automatically filled in (if they were registered on the date the document was issued).
You can also use the item selection option using the Item Selection dialog box. The selection dialog box is called up by clicking the Select products button.
The selection principle is the same in all documents. It has already been considered when preparing commercial proposals.

Let us dwell on some features of selection when selling goods.
In the example under consideration, goods are reserved from the current free balance in the warehouse. Therefore, when selecting, you should analyze the current balances of goods in the warehouse and select those goods that are in the available balance. Information about the available balance of goods is shown for the warehouse specified in the document if the display option Detailed information about balances (show) is set. Since in our example the goods must be shipped from the current balance, we should set a filter based on the availability of goods in the current warehouse (Only available in the Household Appliances warehouse).
It should be noted that usually fixed prices are set when selling goods. Price information is filled in in accordance with the price type specified in the document. Therefore, when selecting, it is recommended to exclude requests for quantities and prices. This will speed up the process of selecting products into the tabular part of the document. However, if you still need to control prices and indicate the quantity of goods when selecting, then you can leave the option to request quantity and price (All actions - Settings - Request quantity and price).
When selecting products, you can use various product search options. To limit the list of products, you can use a filter by item types and properties.
The peculiarity of this selection is that when using it, you can set the selection based on additional information (additional properties and details) that we have arbitrarily added for products. The list of those parameters by which selection must be made must first be added to the Types of Items directory. Each type of item can have its own selection parameters.
For example, when you check the box next to a specific parameter value, a quick selection will occur and only those refrigerators that have the selected type (brand) will be shown in the list. If you additionally set a filter by product availability, then the list will show only those selected brands of refrigerators that are available in a specific warehouse.

This selection method is also convenient to use for selecting products based on their characteristics. For example, if we need to select shoes of size 36, then we can set selection by type of nomenclature “Shoes” and selection by property of the characteristic - size 36.
Using the ability to select by additional properties, you can quickly find those products that have the same properties as the original product. Moreover, this can be done in the general list without setting a filter by types and properties. To do this, use the context menu command Product with similar properties.

You can also use quick context search to search for products. For example, if you need to find coffee makers in the list of electrical goods, then just type this information in the search bar. When using this search option, you should use full-text data search. The search option is configured using the command All actions – Settings – Configure search.

Products are selected for the document by double-clicking or using the Enter key. Products can be transferred directly to the document or first added to the Selected Products dialog box and then transferred to the document. It depends on the position of the switch Total positions selected... (show).

If the checkbox is checked, then after checking the list of selected products you need to click the Transfer to document button. If not installed, the goods are automatically transferred to the document at the time of selection.
When selecting products, you can see a list of those products that are usually sold with the selected product (Sold together with the selected item). To display such products, the Items sold jointly checkbox must be selected in the Administration – Items section. The list of products that are sold jointly is configured in the Regulatory and reference information section - Settings and reference books.
After the goods are selected in the document, it is necessary to clarify the status of security for these goods, that is, whether we can ensure the shipment of this product taking into account previously reserved goods. To do this, you need to call the Supply Status processing in the order.

In the provisioning state, we see that all the positions we have selected are marked in green. This means that all products can be shipped from the warehouse (full collateral available).
In this case, we do not consider the option when the missing goods can be ordered from the supplier, as well as the possibility of partial shipment according to the order. We will consider these questions in the following sections.
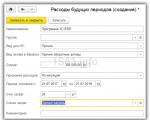
We need a preliminary list of goods to calculate the advance payment amount and issue an invoice to the client. Reservation of goods will be made after we register receipt of payment from the client. After we have decided on the order amount, it is necessary to fill out information about the amount of the advance payment in accordance with the payment schedule.

To fill out payment information, click the Fill in stages according to schedule button. When filling out payment information, we can indicate the type of payment (cash, non-cash, payment card).
Let's assume that the client will pay for the order by transferring funds to the bank account of our company. You need to specify all this data on the page in the Payment Rules dialog box.
You should pay attention to one more parameter that we can fill in the document - Desired shipment date.

The program suggests filling in this date in accordance with the expected date of transfer of the advance payment by the client, since the shipment of goods can only be made after full payment of the client's order.
After all the data has been entered into the document, you need to set the status To be completed in the Customer Order document. Since we do not want to reserve the goods until payment is received from the client, we will set the Do not provide action for all order lines. For group filling, you can use the Fill collateral command.
Since we have drawn up the document in accordance with the terms of sale, we do not need additional approval of the order from management.
After we set the status of the customer order to Fulfillment, the status of the order changed. The status of the order is set to Advance payment expected (until security is secured). Items ordered cannot be shipped (set the Ship action for order lines) if payment for the order is not registered.
Important!
Control of the need for prepayment will occur only if the procedure for conducting mutual settlements is used according to orders.
Let's consider an order from a wholesale customer, reservation of ordered goods and their shipment from the warehouse, without using an order scheme.
Client IP Alkhimov agreed with the organization Stroysnab LLC to purchase goods - refrigerators "SH-10 BOSCH" and "X-67890 Stinol", 10 pcs. An order has been placed. The ordered goods were shipped partially, in two stages. Payment has not yet been made.
Let's run the corresponding example in the standard demo database "1C: Trade Management" ed. 11.3. (In the example, we will use the information available in the demo database upon delivery, as well as product items, the purchase of which was discussed in previous articles and ).
Functions of customer orders in 1C
The agreement between the organization and the client on the wholesale supply of goods is reflected in 1C by a special document - “Customer Order”. It serves the following purposes:
- records the client’s intention and information about the upcoming sale (product, its cost and quantity, sending warehouse, shipment date), that is, it allows you to plan the sales process;
- reserves the required quantity of goods in the warehouse specifically for this client, for sale according to this order;
- if the required product is not in stock, it is possible to place an order for the missing product, and then purchase the product from the supplier for a specific customer order;
- The order allows you to plan cash flow (receipt of payment from the client).
Setting up regulatory reference information (RNI)
1C provides flexible configuration of order functionality. Let's open the sales setup form.
Master data and administration – Setting up Master data and sections – Sales
Let's expand the “Wholesale Sales” subsection. There are three options for customer orders:
- an order that performs only the functions of an invoice for payment (without reserving goods and monitoring execution);
- order only from the warehouse (with reservation, but without the ability to place an order for missing goods);
- order from warehouse and to order (all possibilities included).
By default, the third option is installed in the demo database, and the following functions are included: control of the shipment of goods and payment (when closing orders), recording the reasons for cancellation of orders by customers, registration of sales of goods and certificates of completion of work for several orders. If these features are not required, the user can disable them. In our example we leave it as is.
Document "Sales order"
To enter a new order into the program, let's go to the order log.
Sales – Wholesale – Customer Orders
Creating an order and entering basic information
Let’s create a document using the “Create” button. On the first tab “Basic” (it is open by default) we will indicate the organization and the client. For our example, we will select an agreement with a client with settlements in rubles, as well as a warehouse without using an order scheme. The operation is already set automatically: “Implementation”. There is no need to specify the document number; the program will assign it when recording.

Entering goods into a sales order
Let's go to the "Products" tab and indicate the products that the client ordered. The most convenient way to do this is using the selection form, which, as in other documents related to trade turnover, is opened by clicking the “Fill out” - “Select goods” button.
The selection form looks the same as when filling out the implementation document (for more details, see our article). In the list of types and properties, select “Refrigerators”, after which the nomenclature of this type appears on the left in the list of products. The price of goods, their availability in the warehouse, and the quantity available for sale (i.e., not reserved) are also displayed here. Please note that the price in this example is filled in automatically. Read more about pricing in our next articles.

Select the desired products by double clicking. If the “Request quantity and price” option is enabled (it can be configured using the “More – Settings” button in the selection form), then when you select a product, a window will open to enter the quantity and price.
Important. The form for entering quantity and price in a sales order differs from the similar form in other documents. Here you need to indicate the action that will be performed with the product. The following options are available: ship, reserve in warehouse, provide separately, to provide, do not provide.
– the topic of our next material.

Let's assume that the client arrives to receive the goods in a car that can only hold 10 refrigerators. For the product “SH-10 BOSCH” we indicate 10 pcs. for the “Ship” action, this will mean that the product is ready for shipment, and the customer will be able to pick it up immediately. And for “X-67890 Stinol” we indicate 10 pieces. for the action “Reserve in warehouse”. This item will be reserved for this order.
The selected products are displayed at the bottom of the selection form (if they are not visible, you need to click the “Total selected ..." link). Here you can also see the security option (action) for each product:
To transfer items to a document, click “Move to Document”. Products and actions appeared in the tabular part of the customer order:

Important. If you do not specify an action, the program will automatically select the “For security” option. This means that the ordered product has yet to be purchased from the supplier. Shipment will not be available until the order action is changed.
"Additional" tab in a sales order
Additional analytics and VAT settings are displayed here. Many parameters are filled in automatically. In our example, we leave this information unchanged.

Customer order status
Important. The ability to select a status in a customer order is determined by the order use option specified in the sales settings form (see the beginning of the article).
Depending on this setting, the following statuses may be available in sales orders:
- “Order as invoice” – no status.
- “Order only from warehouse” – statuses “Under approval”, “In reserve”, “For shipment”, “Closed”.
- “Order from warehouse and to order” – statuses “Under approval”, “For execution”, “Closed”.
In our example, the third setting option is used. In this case, the default status of the customer order is set to “For Fulfillment” (the order can be completed immediately). Leave this status:

We will process our order in the usual way. In this case, a message may appear indicating that payment steps will be automatically completed. The topic of payment for orders will be discussed in more detail in the following articles.
Report on reserved goods
Let's see how reserved goods are reflected in the report. Let's go to the warehouse reports panel.
Warehouse and Delivery – Warehouse Reports
We will generate a report “Remains and availability of goods” for our warehouse. The report data corresponds to the information entered in the order. Currently (“Now”) 10 pcs. The first item is in the process of shipment, 10 pcs. the second product is in reserve. Expected consumption (sale) of 10 pcs. each product.

Important. Products in 1C are reserved for a specific customer order and can be sold from the reserve only for this order. They will not be able to be purchased by another client (or even the same one, but not for this order).
Creating a sales document based on a sales order
To reflect the sale of ordered goods in the program, we will create a “Sales” document based on the customer’s order. To do this, in an open order (or in the list of orders, with the required document selected), click “Create based on” and select “Sales of goods and services”:

A sales document has been created, automatically populated with information from the original order. On the “Basic” tab there is a link to the order:

Please note that only those items for which the “Ship” action was specified in the order appeared in the “Products” tabular section (in our example, 10 “SH-10 BOSCH” refrigerators):

Let's create the implementation document in the usual way.
Customer Order Fulfillment Status
In the order list, the status of our order is displayed as “Ready for shipment”, since not all ordered items have been shipped yet. Here you can see the percentage of shipment and debt.
By double-clicking on the order line in the “Current Status” column, you can generate a report on the status of the order.
The same report is also generated using the “Reports – Execution Status” button in the order itself.
The report reflects the shipped goods remaining in reserve (“Collateral”), as well as the client’s debt:

Registration of sales through “Invoices for registration”
Changing an activity in a sales order
Important. To make shipment of a reserved item possible, you must change the action for this item in the customer order to “Ship”.
Let's assume that the client came to pick up the goods reserved for him, but not all 10 refrigerators, but only 8 units. (two will remain in reserve). Let's open a customer order. For the product “X-67890 Stinol” the action “Reserve in warehouse” is currently indicated. Let's change it. Double clicking opens the action selection form. We indicate the quantity in the “Ship” line – 8. The quantity in the “Reserve in warehouse” line has changed automatically.

Click the “OK” button to save the action selection. After this, instead of one line with the product “X-67890 Stinol”, two lines appeared in the customer’s order: 8 pcs. ready for shipment, and 2 remain reserved:

We will process and close the order.
Registration of shipment through “Invoices for clearance”
In addition to creating a sales document based on an order, 1C provides another way to ship goods according to an order: the “Invoices for registration” page. It is available from the list of sales documents.
Sales – Wholesale – Sales Documents (all)

The list of invoices for registration displays orders for which goods are ready for shipment. To create a sales document, you need to select an order (or several orders while holding Ctrl) and click “Place by orders”:

A “Sales of goods and services” will be created with those product items for which the “Ship” action is specified in the order. The implementation document is carried out in the usual way. It will be saved in the list of sales documents.
After completing the sale, the order ceases to be displayed on the invoices page for registration.
Advice. In the list of invoices for registration, click the “More – Settings” button to configure parameters for creating, posting and printing sales documents and invoices.

Boxed software products from 1C are good for their versatility, standard interfaces and ease of learning. Working with orders in 1C is based on a clear and simple document processing scheme.
But even this daily and important work processing orders in 1C Sometimes you want to simplify and optimize.
Convenient order processing in 1C
In the 1C: Trade Management program, orders are documents with a certain set of details.
To see orders in 1c, you need to go to the “Sales” section and select “Customer Orders”. You will see a form for a list of customer orders. In this form you see the details of the order itself such as number, date, client, status, amount.
But what should you do if you need to work with orders and see a larger amount of information, quickly receive information about the products in the customer’s order, etc.
Usually, this is done by modifying the standard form. 1C customer orders.
We offer a completely different processing orders in 1C.
Processing is an external file, the use of which does not in any way affect the integrity of the 1C: Trade Management database, but if desired, it can be painlessly integrated into 1C for working with orders.
There are two tabs in processing work with 1C orders - displaying a general list of orders in 1C and a list of goods for all orders. Each form contains filters for selecting orders by execution status, payment status, and certain properties.
On the order list form, double clicking on the 1C order opens the buyer's order form. In this form, you can set the status of the shipment and enter the sales document.

The proposed order processing in 1C is primarily intended for working with orders that come to 1C from an Internet site. First of all, from 1C:Bitrix. But it can be adapted to any situation depending on the needs of the users.
The given description with processing orders in 1C This is one example of our customization and development in "1C: Trade Management" according to the customer's technical specifications.
We enter documents: buyer order, supplier order, receipt of goods and services, sale of goods.
Buyer order chain – implementation
Let's introduce into the enterprise management system 2.0 the classic chain of movement of goods, starting with a buyer's order and ending with sales to this buyer.
Our chain will involve an order to a supplier. That is, the following documents will be entered - the buyer’s order, then the order to the supplier, the receipt of goods and services, the sale of goods and services to the buyer.
To place an order for the buyer, go to the “Sales” section. Select the item “Customer Orders”. By the way, if you do not have this item, you must not forget that the enterprise management system is customizable, and this item may be disabled in your system. And this is configured in the “Administration” menu in the “and sales” section. There is a corresponding checkbox here - “customer orders”. If it is disabled, we do not have “Customer Orders” in the “Sales” section. Let's turn it back on.
So let's get back to creating customer orders. Let's create a new document. We indicate the client. This will be the "Shining Path". We need to choose the same agreement. And add the product that the client wants to purchase. We will indicate the quantity of the product and its price. We also need to indicate the desired date of shipment. Our document date is the 9th. Let the desired shipment date be the 14th.
Also, on the “Advanced” tab, you need to check the completion of payment stages. We will fill them in automatically. And we will select the payment option - “after shipment”, otherwise the program will not allow us to ship this product without payment, and we do not consider payment in this lesson. Click OK.
And in principle, our document is completed with the exception of such an important point as “Status”. Status is also a customizable item. Statuses can be disabled, but if they are enabled, it must be filled out in order for the document to be posted correctly. In this case, our status is “to be secured”. By clicking the up arrow, the program automatically sets the highest possible document status. Click the “Post and Close” button. And we create a document “Customer Orders”.
In the order itself, we can see the progress status of this order. This report shows: how much the client has ordered, how much needs to be provided and by what date, and how much, in fact, is already collected in the warehouse, and how much has been shipped to him. That is, in this report you can see a complete picture of the execution of this order.
Based on this customer order, we will enter an order to the supplier. Click the “Create based on” button. And select “Order to supplier”. We will open a new order for the supplier. You can also enter an order to a supplier through the “Purchases” - “Orders to Suppliers” section.
So, we have filled out the document on the basis of the order to the supplier. We need to specify the supplier. We also have a tabular section filled in where we just need to indicate the price of the order. On the “Advanced” tab, we must also indicate the stages of payment to the supplier. We indicate the payment stages so that the accountant can pay all our orders on time, so that we have a clear picture of the money that will come to us and the money that we must pay, so that our organization does not have a cash gap. From payments and receipts we create the so-called “payment calendar”. Click OK. We also set the status of the order to the supplier. Click the “Proceed” button.
And then we will create “Based on” directly from the form of this document “Receipt of goods and services”. The system tells us that we cannot enter the receipt of goods and services because the status of this document does not allow us to do so. This can be done only after the status is ready for admission. In order for the status to be “For admission”, we can set it to “For admission” and post the document.
Now we create “Based on” - “receipt of goods and services”. We indicate the date of the document – the 10th. Here we can also indicate that an invoice has been received from the supplier. On the “Advanced” tab we must indicate “Division”. Let's indicate the division - “Purchasing Department”. And click “Post” the document. The document will be processed. And in the “Order to Supplier” we can see the progress status of this order. We see that 5 pieces have been ordered. and also decorated 5 pcs. In the “Order to supplier” we set the status to “Closed”. And we will carry it out.
Now let's go back to our “Customer Order”. And check its execution status. As you can see, it has not changed at the moment. Let’s enter “Based on” the customer’s order the document “Sales of goods and services”. The system does not allow us to enter a document for the sale of goods and services while the document is in the “for collateral” status. We will transfer it to the “for shipment” status. Let's do it. And let’s introduce “Based on” - “sale of goods and services”. Here we also need to indicate the division on the “Advanced” tab. Let's indicate "sales department". We will also create an invoice. And we'll go through the document.
Let's return to the customer's order. Let's see its execution status. As we see, in the document 5 pieces were ordered, 5 pieces were issued. Thus, we see that the order has been completed. Let’s set the status of the customer’s order to “Closed”. And we will carry it out.
Thus, we went through the entire chain from the client’s order to the sale of goods to the client. Let's see how this affected the company's activities. Let's go to the "Finance" section. Let’s open the “Financial Reports” item. And open the “Enterprise Gross Profit” report. Click the “Generate” button.
As we can see, the system shows us revenue and cost by department, organization and manager. But in this case, the cost has not been calculated and the program shows us 100 percent profitability of our operation. What is this connected with? This is due to the fact that the cost in this program is calculated separately.
Let's calculate the cost of our operation. To do this, go to the “Month Closing” section in the “Finance” menu. Click the “Calculate” button opposite the “Cost cost calculation” item. The cost will be calculated.
If your cost has not been calculated, then perhaps you have not set up an accounting policy for calculating cost. To do this, you need to go to “Settings and Directories”. And indicate the setting of methods for assessing the cost of goods. In this case, it is indicated as the average for the month. But it can be FIFO weighted or rolling valuation. Also a very important checkbox is to update the cost with a regulatory task. It means that the cost will be recalculated automatically once every predetermined period of time.
But let’s return to our “Enterprise Gross Profit” report. Let's form it. We will see that the cost has been calculated. We achieved gross profit and profitability.
Customer orders in the 1C Trade Management program version 11.2 are used to plan the process of selling goods to our customers.
The orders themselves are located in the section "Sales". By command "Customer orders" we go to the log of relevant orders. At the top of this log are quick selection commands. For example, this is the current status of the order, the order completion date, and the responsible manager. You can create an order directly from this journal.
The mechanism for using orders in the section is being configured “Regulatory and reference information and administration”. In setting up partitions "Sales", in Group "Wholesale" there are flags that are responsible for the corresponding options. For example, the main flag is "Customer orders". Setting this flag allows you to activate the use of 11 customer orders in the 1C Trade Management program.
- You also need to choose how these orders will be used. There are three options: First - "order as invoice". When this flag is set, the order will be used exclusively for printing invoices for our clients, and based on such an order, the goods will not be reserved, and the execution of customer orders will not be monitored.
- An order can also be used to reserve goods in stock. To do this, set the option "order only from warehouse". Based on such customer orders, it is already possible to control their execution. Payment can be scheduled and these orders can be used to reserve goods in warehouses.
- The third option is “order from warehouse and to order”. It differs from the previous one in that you can reserve a product that is currently out of stock, and thus create a need for this product. And, in the future, based on this need, it will be possible to generate orders to the supplier. When a product arrives, it will automatically go into reserve for that order.
Also, several more options are used to manage orders, namely - “do not close partially shipped orders and requests”, “do not close partially paid orders and applications”. If these flags are set, the manager will not be able to close the corresponding orders until the specified condition is met.
Flag "reasons for canceling customer orders" allows you to activate the directory in the 1C Trade Management program "Reasons for canceling customer orders". And when setting the appropriate flag in customer orders, it will be necessary to indicate the reason why this order is being canceled.
The second way to create customer orders is to perform the corresponding step when using customer transactions. When using customer transaction management. For example, now on my home page in the list of my tasks the task is installed - Create an order for a transaction.
Opening the appropriate command I have the command "create order". Using this command, the 1C Trade Management 11 program, based on the information already entered at the previous stages for our transaction, creates a customer order.
We have already filled in all the basic information. Let's get a look. The fields “client”, “counterparty” and “agreement” are required. Configuration 1C Trade Management (UT 11) 11.2 will not allow you to save and post a document without specifying this information. We also have already filled in: type of operation “sale”; the organization on whose behalf the sale of goods will take place; warehouse from which the sale is planned.
Via hyperlink "Payment" We are opening payment rules. Right now they are not filled. You can use the command “Fill in by agreement”, and based on the agreement with the client, the relevant information will be filled in. In our case, these are “advance payment (before security)” and “prepayment (before shipment)”. We will transfer this information to our customer order.
Let's go to the main tab "Goods" and let's see what information we have reflected here. Based on the commercial proposal drawn up at the previous stage of our transaction, approved and agreed upon, we filled out a tabular section in which we see a list of our products, quantities, prices, automatic discounts (manual discounts were not applied here) and the amount (VAT rate).
The very last right column is where the “canceled” flags are set, and you will need to indicate “for reason”. If we set such a flag, it will be necessary to indicate from the list of pre-entered reasons the reason why the corresponding position is canceled. This line is highlighted in gray, which indicates the cancellation of this position.
Also in the buyer’s order there are two important fields that affect the behavior of the 1C Trade Management (UT 11) 11.2 program, namely - "order status". We currently have 3 statuses available:
- Status "to be agreed upon"- in this status the order does not make any movements. Items are not reserved until the order has been agreed upon.
- Status "to be carried out", which is installed now, indicates that the order is now in the execution stage, that is, payment, shipment and reservation of goods are planned for it.
- Status "closed" indicates that the order is closed and no further work is being carried out with it.
It is also possible to set priorities, which is additional analytics when working with customer orders. And the main field that you should pay attention to is - "actions". In this case, we have action filled in for all positions "to ensure". You can use the corresponding assistant in which we set the flags. For example, available actions:
- "Do not provide" order, then the requirements for this order are not calculated, the goods are not planned for purchase.
- "Towards provision"(what we have installed now) - indicates that work on this order begins, and the need for this product will be determined in orders to the supplier.
- “Reserve as soon as available”- indicates that the order must reserve the goods as they arrive at the warehouse in case of their absence.
- “Reserve in warehouse”. This product will be reserved from the free balance in the warehouse.
- And action "Ship" indicates that the goods can already be shipped directly.
We have one more assistant - "Order supply status". By going to it, we can see what item items we have in the document, what is reserved, what is in security, what actions can be performed (for example, we have a product in the warehouse, it can be reserved, and also what warehouse is used in in this case).
On the tab "additionally" indicates the transaction under which our order is placed; responsible manager; the department in which the responsible manager works; currency; the flag “price includes VAT” and taxation - that the sale is subject to VAT.
On the tab "Goods" You must fill in the estimated shipment date. In this case we have the flag set “ship on one date”. If we remove it, the estimated shipping date will appear on each line of our item. Let's set today's date, and such an order is able "to be carried out" can be swiped and closed.
Program 1C Trade Management (UT 11) 11.2 says that the order could not be processed. Let's look at the reasons for the refusal. In this case, the 1C Trade Management program controlled the customer’s orders, namely, the program did not like the fact that we were trying to deliver the goods “for collateral,” although for this order we have the first payment item “advance (before collateral”). That is, until the corresponding advance payment is received for this order, the commodity items “our goods” are not sent to work, and we cannot reserve them and cannot place them “for provision” with our supplier. Therefore, on all lines I set the action "not to provide", and I’m already trying to place such an order again.
Configuration 1C Trade Management version 11.2 processed this order and marked the corresponding task - “create an order for a transaction” - as completed.
The 1C Trade Management 11 program takes us to the next stage of our transaction, namely - “confirm the obligations under the transaction”.
Thus, in the 1C Trade Management program version 11.2, work is carried out with customer orders both within the framework of transaction management and outside the framework of transaction management.