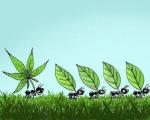
Finger puppets with their own hands. Do-it-yourself finger theater Print templates for finger toys made of paper
Learn how to create a puppet theater with your own hands. At the same time, characters can not only be sewn, molded, but also made from plastic spoons, wooden sticks.
DIY finger puppet theater
Do you want to develop fine motor skills baby, speech, thinking and just be able to cheer up the whole family, then turn the room into a temple of art. To do this, you need to know how to make a finger puppet theater with your own hands.

For this you will need:
- felt;
- threads;
- scissors.
Fold 2 blanks of the character with the wrong sides, sew along the edge on a typewriter or with a thread with a needle in your hands.
To make a beard for grandfather, wind the threads around your fingers in several rows, cut them on one side. Fold these identical threads in half, sew the beard in place.
But what can be the heroes of the fairy tale "Rocked Hen".

Cut out the beard and bangs of the grandfather, the hair of the grandmother from gray felt. It will also help create a mouse with a long tail. These are the dolls puppet theater can be sewn. If the baby will wear them, cut them out so that they are the size of his fingers. If the performance will be shown to children by adults, then cloth puppets should be slightly larger.
Check out one more interesting idea. This can be a home puppet theater for staging the fairy tale "Turnip". In kindergarten, it is better to have larger characters so that the whole group can see them from afar. But you can also do this by taking:
- modeling paste (preferably Jovi, which does not need to be fired, it hardens in air);
- yellow and green paste Jovi Patcolor;
- acrylic paints;
- brushes;
- markers;
- stacks.

- Let's sculpt the grandfather first. Take a piece of pasta measuring 2x3 cm, roll a sausage out of it, form a cylinder. You should get a kind of nesting doll with a torso and head, and at the bottom there will be a notch for a finger.
- Separately fashion the handles, attach them to the body. But mark the facial features, beard, mustache with the help of a stack.
- By the same principle, fashion a grandmother, granddaughter and animals. When these characters are dry, color them in. acrylic paints.
- For a turnip, roll a ball of yellow paste, pull it out a little from above, insert green plastic tops here, fix it.

When sculpting with paste, you will find that it dries quickly in the air, so periodically moisten your fingers with water.
This is how you get a finger puppet theater, with your own hands the child will be able to play the fairy tale "Turnip" or come up with his own plot with some of these characters.

Table theater do it yourself
If you want to have a tabletop theater with paper dolls, then zoom in on the next image. Print it on a color printer on thick paper. If this is not possible, attach a sheet of thin paper to the screen, transfer the outlines to it. Then place on cardboard, draw outlines, let the child decorate the characters with colored pencils or paints. It remains to cut out the images, glue each one on the side and glue the top of the head to the head.

And here are some more templates, according to which puppets for the theater are easily made. With your own hands or, having given the blanks to the child, cut them out along the contours, glue them in pairs.

If a small rectangular sheet of colored paper is glued on the side, you get a small tube. It should be such that it sits well on the finger. Glue the ears, nose, eyes, front paws to the blank, and you get the hero of the finger puppet theater.

These characters can be made from the most unexpected materials. See how to turn plastic spoons into stage characters.

To make such toys for the puppet theater, take:
- plastic spoons;
- colored paper;
- scissors;
- finished plastic eyes;
- glue gun;
- textile;
- narrow tape, scissors.
- Use a glue gun to glue the finished eyes to the convex side of the spoon.
- Turn a piece of fabric tied with a ribbon into a dress. For male character just stick a bow tie around your neck.
- Cut strips of colored paper with a fringe on one side, glue this hair. Pieces of colored cotton wool will also replace them.
Other characters are controlled in the same way, for the creation of which you will need:
- ice cream sticks;
- children's magazines;
- glue;
- scissors.

If you want to make another tabletop theater, then milk bottle caps will come in handy. Plastic cups for yogurt.

Glue on the back of these items paper heroes fairy tales, and you can play old stories with them or invent new ones. The background is created from a large sheet of cardboard, which is painted in the theme.
How to make a screen for a puppet theater?
This is an essential attribute of the puppet theater. Check out the easiest options:
- Close the opening under the table with a cloth, tying two of its corners to the top of one and the other leg. The child sits on the floor behind and leads the characters at the level of the table top - just above it.
- Take an old curtain or sheet. Collect any of these canvases on a rope, tie the ends of the thread on one and the other side of the doorway. Make a rectangular cut in the center at the top of any of these canvases. It should be at such a height that no child or adult sitting behind the curtain can be seen, who play the role of puppeteers.
- For the finger theater, a table screen is made. The easiest way to make it out of cardboard. The box is taken. It needs to be disassembled, pasted over with wallpaper or colored paper, bend 2 sidewalls so that a canvas of sufficient size remains in the center. A cutout is made in it, through which the puppeteer shows finger toys.

And here's how to make a screen out of plywood. For her you will need:
- plywood;
- jigsaw;
- fabric or piece of wallpaper;
- glue;
- small door hinges.
- Based on the dimensions presented, cut out 3 blanks from plywood: the central and 2 sidewalls. Cover them with fabric.
- When the canvas is dry, attach the loops to the marked areas so that you can close the puppet theater screen and fold it.

See how to make a cardboard screen to be able to show performances with mitten, glove, cane puppets. It should be such that the puppeteer fits there freely, standing in full height. If the performance is shown by children different ages, then the tall ones will kneel, placing a pillow under them.
In order to make a screen, you will need:
- PVA glue;
- rope or lace;
- carton boxes;
- wallpaper;
- stationery knife;
- awl;
- roulette;
- wide brush;
- long line;
- rag.

A do-it-yourself screen for a puppet theater is made as follows:
- The drawing is given for teenagers or adults whose height is 1 m 65 cm. If you are making a screen for children, reduce this figure.
- To make it strong, make it three-layer. For this one big leaf paste the second cardboard, then on the other side - the third. Apply PVA glue with a wide brush. Thus, you will make a frontal part - an apron.
- The side elements are also made in three layers, but the folds, which you then glue to the apron, should consist of one layer.
- Connect the parts by gluing them. When the glue dries, sew in these places with a cord, having previously made holes in the attachment points. Attach the top arch in the same way.

It remains to paste over the screen with wallpaper of a soft color so that they do not distract from the theatrical performance.

We make do-it-yourself doll gloves
These can be seen in a real puppet theater. Puppets wear gloves on their hands. By bending your fingers, you can make the fabric character tilt its head, move its arms.

A children's puppet theater at hand will have many characters if you use the suggested template.

But it is not necessary to create all the heroes at once. Let's start with two - bunnies and a pig. Having understood how to make such dolls gloves, you can sew others, thereby gradually replenishing your theater.
If you then make human dolls, you can make a hairstyle from fabric or thread.
The thickness of the character's neck should be such that the puppeteer will stick the middle and index fingers to control the hero of the play.
Before sewing puppets for the theater, place a puppeteer's glove on the recut pattern to decide if the base is suitable. If not, then increase or decrease it. You can do without a glove by putting the puppeteer's hand on the base pattern. Keep in mind that the character will not be static, so you need to add a little on all sides for a loose fit so that the fabric of the hero of the action does not stretch while controlling him.
So, here's what you need to sew a glove doll:
- artificial fur and / or plain fabric;
- tracing paper or transparent paper or cellophane;
- pen;
- scissors;
- threads;
- eye buttons.

Lay the pattern on the fabric folded in half, cut out with a 7 mm seam allowance. For a bunny, it is better to take a gray fabric or white fur, for a piglet - pink.

If you want to draw facial features, ponytails, palms, hooves, then do it now before sewing both halves of each character. Take special fabric dyes that do not fade when washed. If there are none, then use watercolor, gouache, but first apply a PVA solution to the fabric, after it dries, paint this place, but use a minimum of water. When the paint dries, put another layer of PVA on top to fix it.
But it is best to embroider the nose, mouth, pulling these sections on the hoop or sew on blanks of the appropriate colors and buttons-eyes.
Cut out a white fur shirt-front for the bunny glove doll, sew its triangular part to the front half, and the semicircular, in the form of a collar, to the back. To the same reverse side a tail is sewn, and white paws with or without pink claws are attached to both parts.

When small details are sewn, you can grind both halves of the doll on the wrong side on a typewriter or on the face - on your hands. In the latter case, use a seam "over the edge" or take an inlay of a passing color, turn around the side seam with it.
In this technique, other glove dolls are also created, for example, a pig.

When the sides are stitched on all sides, hem the bottom. The ears of the characters can be stuffed with cotton wool or padding polyester. Fill the nose of the piglet with any of these materials, only after that sew this “patch” to the head. Make an applique on his cheeks, giving them a blooming look. It remains to sew some yellow threads between the ears, and another glove doll is ready.

Now you know how to sew characters for a puppet theater, if you want to see it too, then watch the following stories.
![]()
Finger puppet theater is an exciting educational activity for kids. It perfectly expands the imagination, strengthens fine motor skills. The heroes of such a theater, that is, toys, can be self-made, sewn or knitted, cut out of paper or wood. Making a finger theater with your own hands is quite simple. Let's consider all the ways.
Let's see how to mold the toys of the famous fairy tale "Turnip".
We will need:
- modeling paste. Very good JOVI, which becomes hard in the open air. It dries quickly and does not need to be burned. The paste can be coated with paint or varnish;
- green and yellow JOVI Patcolor pastes;
- brushes;
- acrylic paints;
- stacks (special sticks with tips);
- markers.
It is necessary to take a paste with a volume of a third of a matchbox. Let's start with my grandfather. We sculpt the cylinder, form the head, outline the torso. In general, the result should be a figure in the form of a nesting doll. At the base of the matryoshka, you need to make a hole for the finger. To the finished body, you need to attach handles molded from the same paste.

Remember to constantly wet your fingers with water, as the paste dries quickly in the air. Small parts- mustache, beard, nose, eyes - it is better not to fashion, but to cut it out in a stack.
All the characters of the fairy tale are made in the same way, the rest of the toys - from the grandmother to the mouse. Don't forget to make a hole for your finger in the base of the toy!
We make a turnip as follows: we sculpt a sphere from yellow paste, and with the help of a stack we cut out tops from a sheet of green paste. We fasten the "vegetation" to the root crop, fix it tightly.

When the heroes of the "Turnip" have dried up, we paint the toys with acrylic paints, using brushes. You can entrust this work to the child himself. Plasticine puppet theater is ready!
Paper Finger Theater

Making a do-it-yourself finger theater out of paper is even easier. We will need:
- multi-colored and plain paper;
- glue;
- paints;
- brushes;
- scissors.
Making finger toys out of paper is easy. You can find templates on the Internet, print them on a color printer, cut and glue. You can simply cut out the paper “fingertip” of the desired character, color it yourself and also glue it.


If you or your child are strong in origami, then in this case the scope for imagination is simply unlimited. The only negative is that such dolls are very fragile and short-lived. On the other hand, every day you can put on a new play with new characters. That is, it is a theater where the most ambitious productions and the introduction of new characters are possible with the relative simplicity of implementation.

Sewn finger theater
Toys sewn from dense fabric are as durable as those made from paste. Such finger puppets can be made of wool, felt, leatherette, felt. In addition to the fabric itself, we will need, of course, threads, a needle and elements for embroidering the muzzle of a toy: beads, sequins, etc.

How to sew dolls? First of all, decide - can you make patterns for cats, chanterelles, dogs on your own, or is it better to use ready-made ones? There are a lot of them on the web. Further - simple work. We transfer the pattern to the fabric, cut out two parts of the doll, sew them with a regular seam over the edge.

However, if you know how to work on a sewing machine with small forms, then it’s even better - the edges of the doll will turn out to be more accurate. When the silhouette is ready - do not forget that the base cannot be sewn, with the help of it the toys will be put on the finger - we embroider with a floss seam or we make eyes and a nose with the help of beads. The toys are ready. It remains to put them on your fingers and arrange a performance.
Another option: link. But for this you need to be able to knit, and quite well.
Colored paper is a versatile material. She can easily turn into a kitten, dog, hero of your favorite cartoon or fairy tale. A little imagination and effort - and now you already have the scenery ready. What you need for a fun dialogue of little animals.
So, we choose the right colors, prepare glue, paints, felt-tip pens, pencils and go ahead - make wonderful finger puppets.
1. Print and cut out the diagrams finger toys.


2. Glue the faces of the little animals.

3. Now glue the torsos. From a strip of white paper, make a finger holder in the shape of a ring and glue it to the inside of the toy's head.

Kids, as a rule, are delighted not only with the process of creating figures, but also with participation in the performance itself. So, if the younger brother or sister wants to try himself in the role of, for example, a bunny, I hope you will not mind.


Well, the dolls are ready! The theater performance begins!


But if you want to make fairy-tale characters (king, princess, knight, dragon or pirate robbers), print out the following templates:


Puppet theater for the little ones:

And here are a few more finger puppet templates for pleasant leisure time with the baby:


Finger toys are easy and fun to make. Note that dolls made from several materials at once - paper, fabric, beads - look very cute and touching. Think about it when creating the next character for the game.
Marina Topychkova
The purpose of my work:
Create conditions for the development of children's creative activity in theatrical activities.
Tasks:
1. Improve the ability of children to convey the images of the heroes of a fairy tale.
2. To develop fine motor skills of the hands and fingers in children, develop memory.
3. Form friendly relationships.
4. Enrichment of vocabulary.
5. Increasing the level of speech development.
6. Cultivate the ability to perform freely and loosely.
Methods:
Playful, creative, verbal.
Preliminary work:
Reading the story, looking at the illustrations.
What is Finger Theatre?
Finger theater- This is a set of figurines-characters that are put on a separate finger. It can be just individual dolls, animals, some items for staging a fairy tale, or everything. famous characters our beloved Russians folk tales. When playing, it is important to work with different fingers, pairs of fingers, one and two hands, several fingers at the same time. All this helps with the development of coordination of movements, the brain.
1. Finger theater is a unique opportunity to place a fairy tale on the palm of a child, in which he can play the role of any hero.
2. Theater is also an excellent speech and sensory-motor simulator. Dolls develop the mobility of the fingers of both hands, help to master the speech of the characters, help to develop lexicon and activates speech functions.
3. The game can be used for dating and learning counting
(for example, in the fairy tale "Teremok" a mouse, a frog, a hare three together began to live, then a fox came - there were four of them);
to get to know the characters and the plot of the fairy tale,
to get acquainted with the concepts of “right - glory”, “nearby”, “one after another”.
4. And small figurines of the finger theater will keep you company during the walk. With their help, you can revive any poems, fairy tales, nursery rhymes. Simple toys develop intonation, artistic skills, Creative skills, imagination, memory, thinking, attention, fantasy.
Benefits of finger theater
The finger theater is one of the types of puppet theater and has the following advantages over its other types:
Finger theater promotes the development of fine motor skills. Thanks to actions with puppets, thin differentiated movements of the fingers are formed;
The use of finger theater does not imply that the child has special technical skills that may be needed when using glove puppets, puppets, etc.
Finger theater is familiar to children from the youngest preschool age, since educators widely use it on various activities in the learning process;
In dramatizations, the finger theater allows the child to show several characters at once;
Finger theater puppets take up little space and do not require large material costs. There are various types of finger theater made using various technologies that take into account the physiological capabilities of children.
In the finger theater, director's play is used as a type of theatrical games. In it, the child does not play the role of any character himself, but controls the artists - puppets. In this type of theatrical game, the child “voices” his characters and comments on the plot as the author, thereby developing his monologue speech.
Types of finger puppets
1. Finger theater made of paper. Perhaps the easiest type of finger tetra that you can make with your child. The disadvantage of this type of dolls is their fragility. Due to its lightness, this type of finger theater is recommended for use on initial stage working with children of all age groups.
2. Finger theater made of fabric. Such a theater can be purchased in stores. You can also make it with your own hands, but having previously prepared a pattern. Due to the material is very functional. Can be used in all age groups.
3. Finger theater from junk and natural material. Another type of easy-to-make finger theater. The material can be various cups, pieces of cloth, threads, buttons, plastic spoons and forks, etc. You can make such a theater together with the children, having previously prepared the material. Prerequisite: the safety of the material used. Such a finger theater can be used in all age groups, while taking into account the physiology of children.
4. Wooden finger theater. It has gained wide distribution in various online stores. Producers pack such a theater in a variety of "boxes" that correspond to the theme of a particular work. Figures can also be used as table theater. Often used on junior group due to the small recess for the finger. The main disadvantage is the difficulty in choosing the size of the dolls for each child.
5. Knitted finger theater. One of the most durable and easy-to-use types of finger theater. The main condition: possession of knitting skills, as well as the availability of certain patterns for knitting a particular character. Puppets of such a finger theater are very "live", soft and pleasant to use. Can be used in all age groups.
6. Finger theater made of felted wool and fabric. Felting or dry felting is the process of making products using special needles that mix and tangle wool fibers. Dry felting is suitable for creating three-dimensional products: toys, decorative figurines, designer dolls, drawing patterns on felt and felt.
7. Finger theater "Puppet heads". Usually factory. Can be made of rubber or plastic. Requires the child to own a certain technique, as it is the most difficult to use.


This is the kind of theater we have.
Now I want to introduce you to the manufacture finger puppet origami technique.
First we make the body of our doll


Now fold the head.


Here we have such a fox. You can also make other heroes of the fairy tale, only by changing the ears and the sharpness of the muzzle.
Maybe someone will be interested in my work and want to do the same theater with the guys.
Tatiana Verukhina
Importance of small toys for little ones fingers is hard to overestimate. Such toys have many valuable qualities that are not found in any newfangled children's toy.
Games with finger puppet theater develop curiosity, imagination, sociability in a child, contribute to the development of speech, memory, attention, perseverance, broadening one's horizons. In addition, the child can invent stories on his own. By using finger theater you can conduct educational conversations, and, of course, develop fine motor skills and prepare your hand for writing.
Also, play this theater the smallest, and older children, and even parents can.
I suggest you make the simplest view together with the children finger theater - paper. TO making a paper puppet theater You can also involve your child. This process can be quite exciting for him. A younger kid will be able to draw a face, and an older child will be able to complete the whole process completely independently, under the guidance of an adult.
For this we need:
White and/or colored paper;
Scissors;
PVA glue;
Ruler;
Simple and colored pencils, markers.
To start, you need to paper draw squares.
We made a square 6 * 6cm and 8 * 8cm with 6-year-old children.
Then boldly cut them out.
After that, we make cups using the origami technique according to the scheme (see photo)
Now the process becomes creative. On the cups, you can draw faces and faces of various characters from fairy tales or cartoons, or we print "faces" the desired characters on the printer, cut out and glue on cups with "facial" sides.
dolls for finger puppet theater ready!


Related publications:
 Production of theatrical toys for the finger theater and theater on the flannelograph Acquaintance with the theatrical game we started in the process.
Master class for parents "Making a finger theater from dough" Master class for parents. Making a finger theatre. Characters of the fairy tale "Gingerbread Man" using the testoplasty technique. (Slide number 2).
 Good day, Dear colleagues! I bring to your attention Master Class"Fox" for finger theatre. We need to work.
 Master Class. Stand for finger theater. Educator: Kuznetsova Irina Alexandrovna Dear educators! I offer you a master class.
 Good evening dear colleagues! As you know, "Finger Theater" is a wonderful game that adults and children like. Finger.
 Today I present to your attention a master class on making masks for showing the fairy tale "The Fox and the Hare". The master class is designed for children.
 Theatrical games occupy a certain place in the system of work kindergarten. Familiarization with different types theaters start early.